> ## Documentation Index
> Fetch the complete documentation index at: https://docs.gable.ai/llms.txt
> Use this file to discover all available pages before exploring further.
# Single Sign-On (SSO)
{false && (
<> Disable rule for inline HTML, and a couple others
)}
{false && <> markdownlint-disable MD001 MD033 }
Gable supports SAML 2.0 Single Sign-On (SSO). When SSO is enabled, users authenticate through your identity provider avoiding the need for a separate Gable username and password. A Gable account is provisioned automatically the first time a user logs in via SSO and any previously set password is disabled at that point. Username-and-password access remains available for accounts that do not use SSO such as dedicated service accounts.
## Steps to configure Single Sign-On
To configure SSO, follow the below steps:
### 1. Retrieve your SAML configuration details
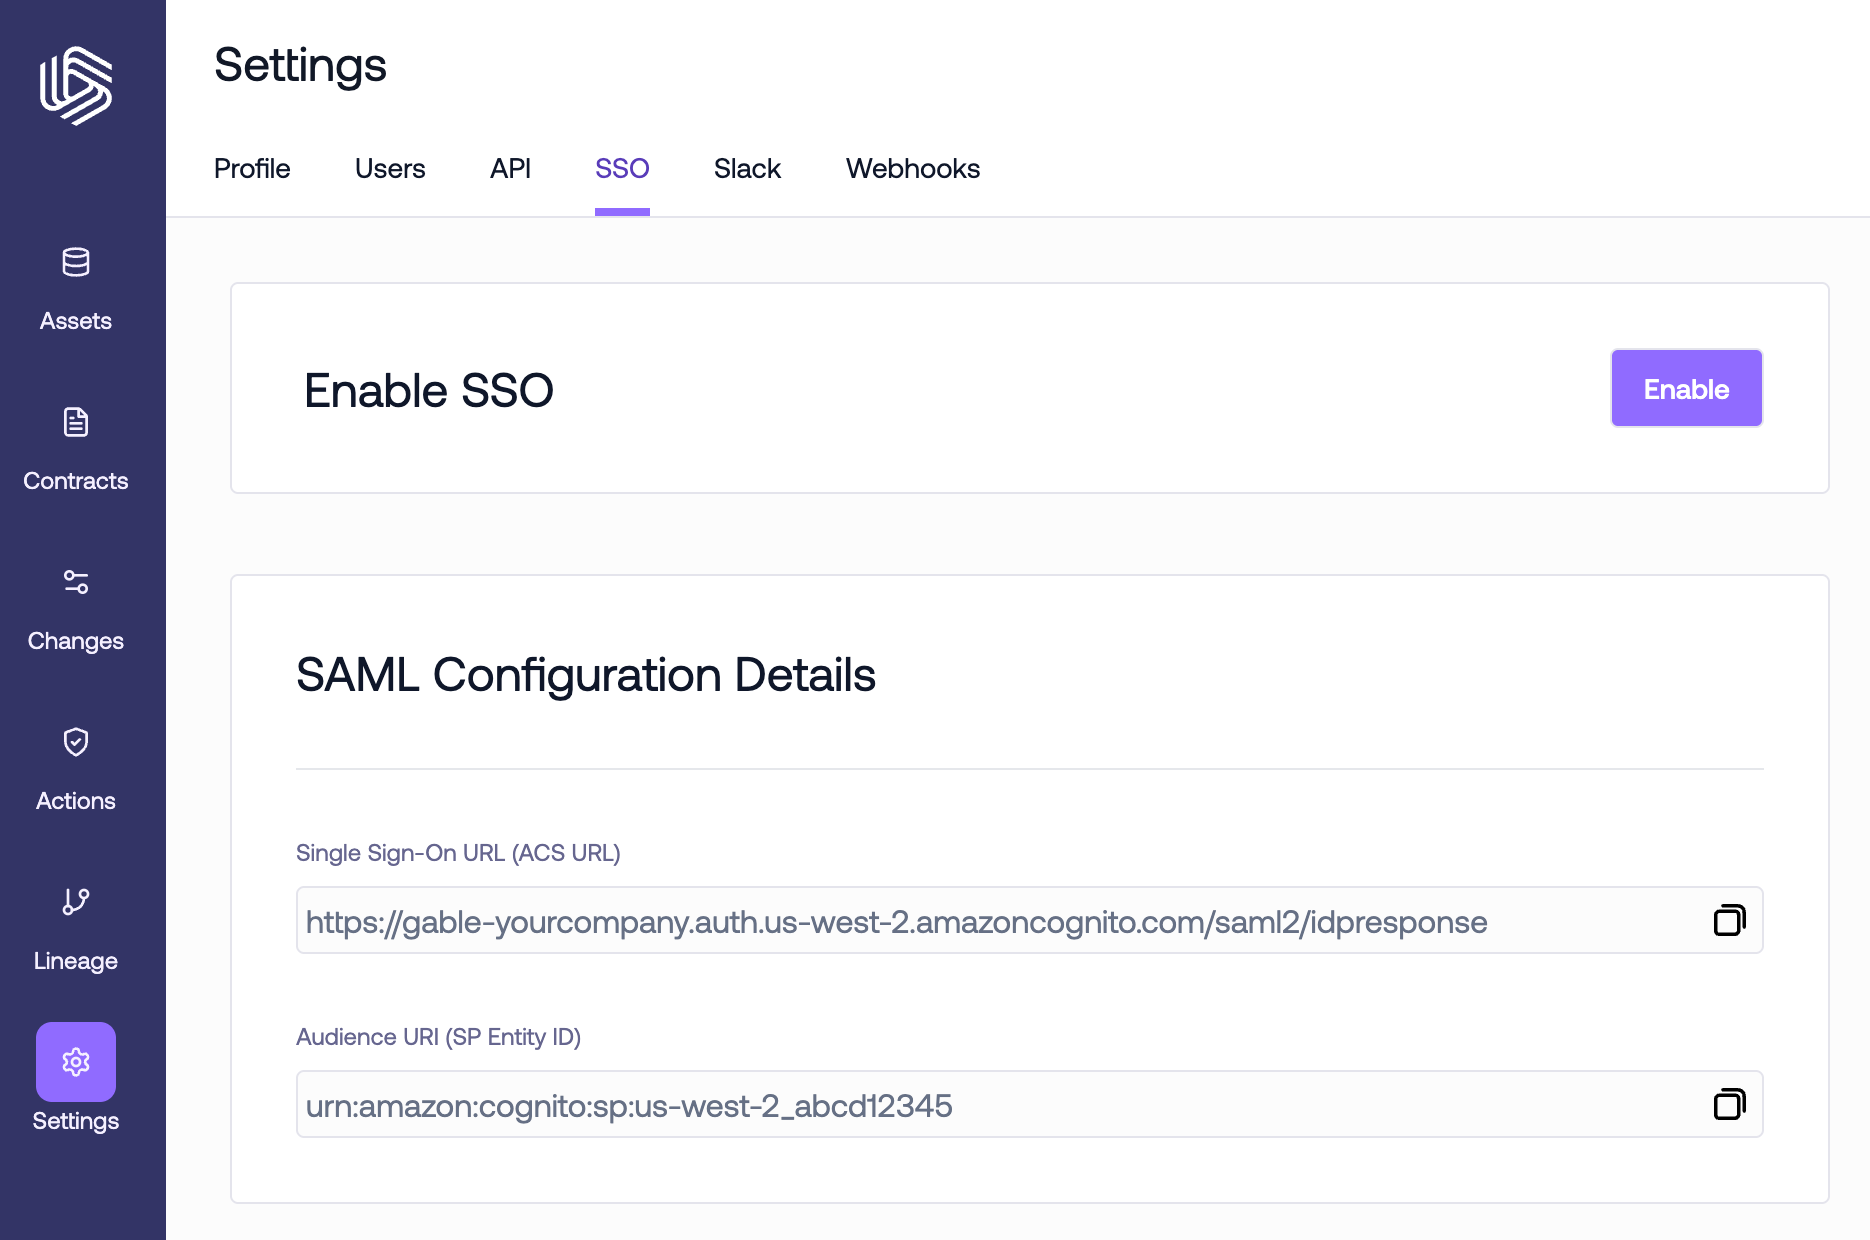
In order to create a new SAML 2.0 application in your identity provider, you'll need two pieces of information that are specific to your Gable account:
* **Single Sign-On URL (ACS URL)**: Also known as the Assertion Consumer Service (ACS) URL or SP sign-in URL. This URL tells your identity provider where it should send SAML Response after authenticating a user.
* **Audience URI (SP Entity ID)**: Also known as the Service Provider (SP) Entity ID or Issuer. This is a unique identifier for your instance of Gable.
Navigate to the `Settings->SSO` page in the web console to find the values for your account. Keep the tab open or copy the values for use in later steps.
 ### 2. Create a new SAML application in your identity provider
Follow the instructions below for your identity provider.
1. Log in to the Okta Admin portal. From the `Applications` page, click `Create App Integration`.
### 2. Create a new SAML application in your identity provider
Follow the instructions below for your identity provider.
1. Log in to the Okta Admin portal. From the `Applications` page, click `Create App Integration`.
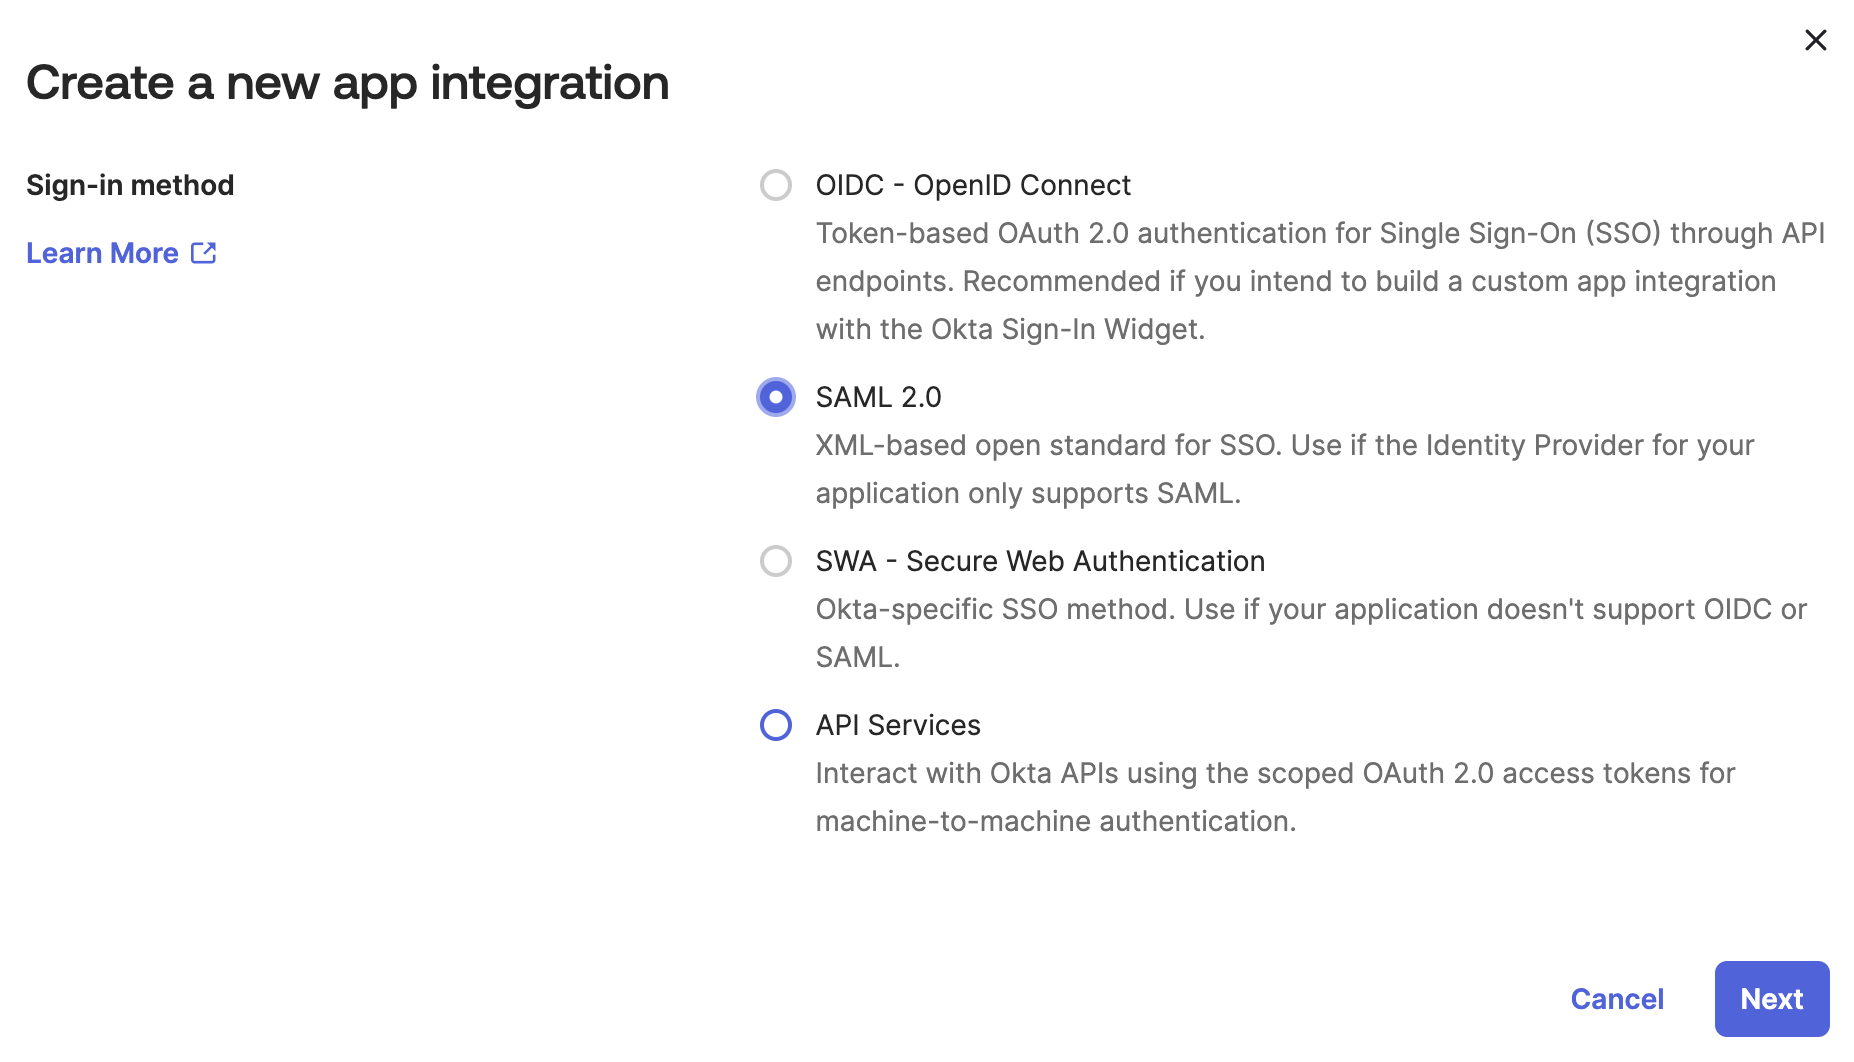
 2. Select `SAML 2.0`.
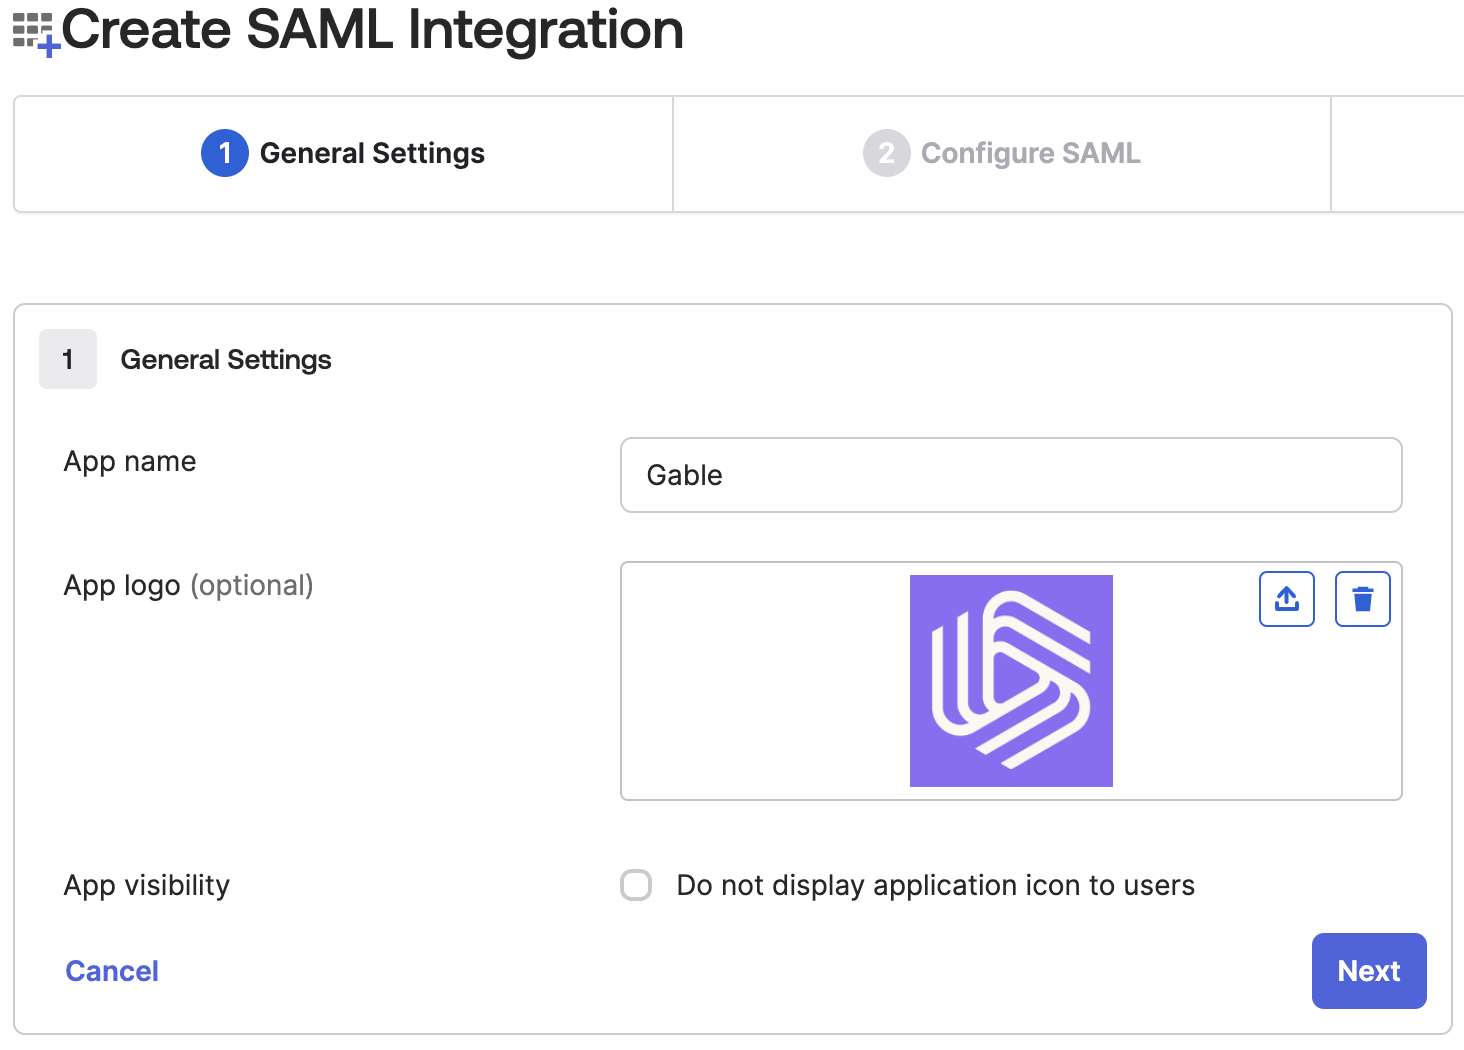
 3. Name the app `Gable` and set the logo (you can download the logo [here](../assets/GableLogo.png)).
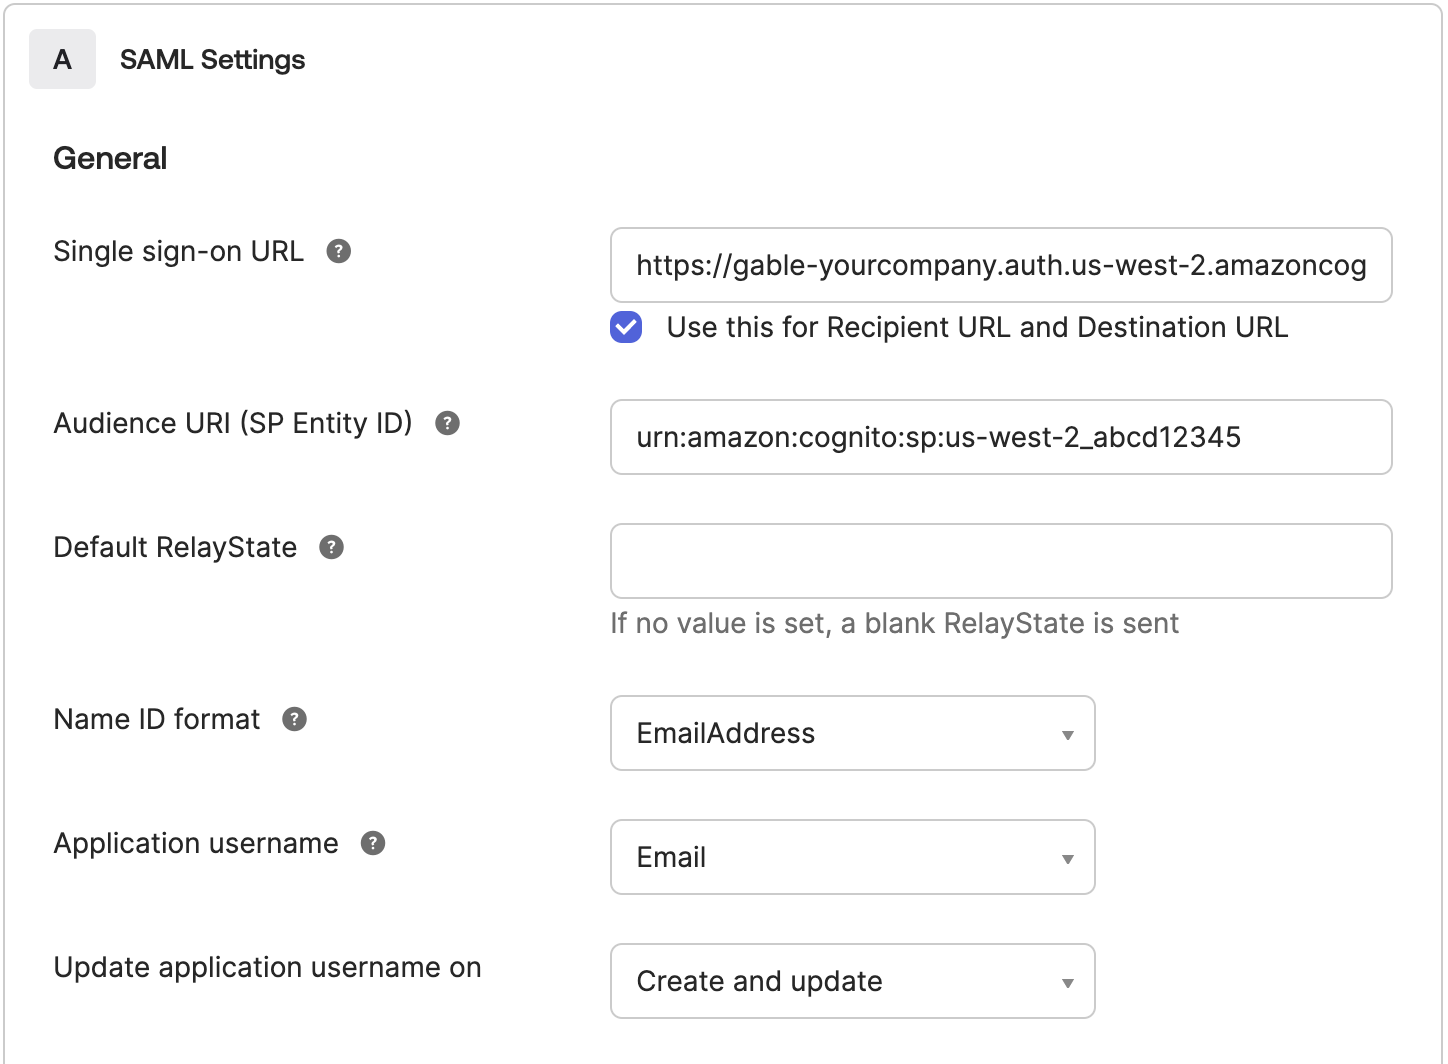
 4. Under the `SAML Settings` section, fill in the form using use the values you retrieved earlier from Gable's `Settings->SSO` page.
* **Single Sign-On URL**: Use the value from Gable's `Settings->SSO` page
* **Audience URI (SP Entity ID)**: Use the value from Gable's `Settings->SSO` page
* **Name ID format**: set to `EmailAddress`
* **Application username**: set to `Email`
* **Update application username on**: leave set to `Create and update`
4. Under the `SAML Settings` section, fill in the form using use the values you retrieved earlier from Gable's `Settings->SSO` page.
* **Single Sign-On URL**: Use the value from Gable's `Settings->SSO` page
* **Audience URI (SP Entity ID)**: Use the value from Gable's `Settings->SSO` page
* **Name ID format**: set to `EmailAddress`
* **Application username**: set to `Email`
* **Update application username on**: leave set to `Create and update`
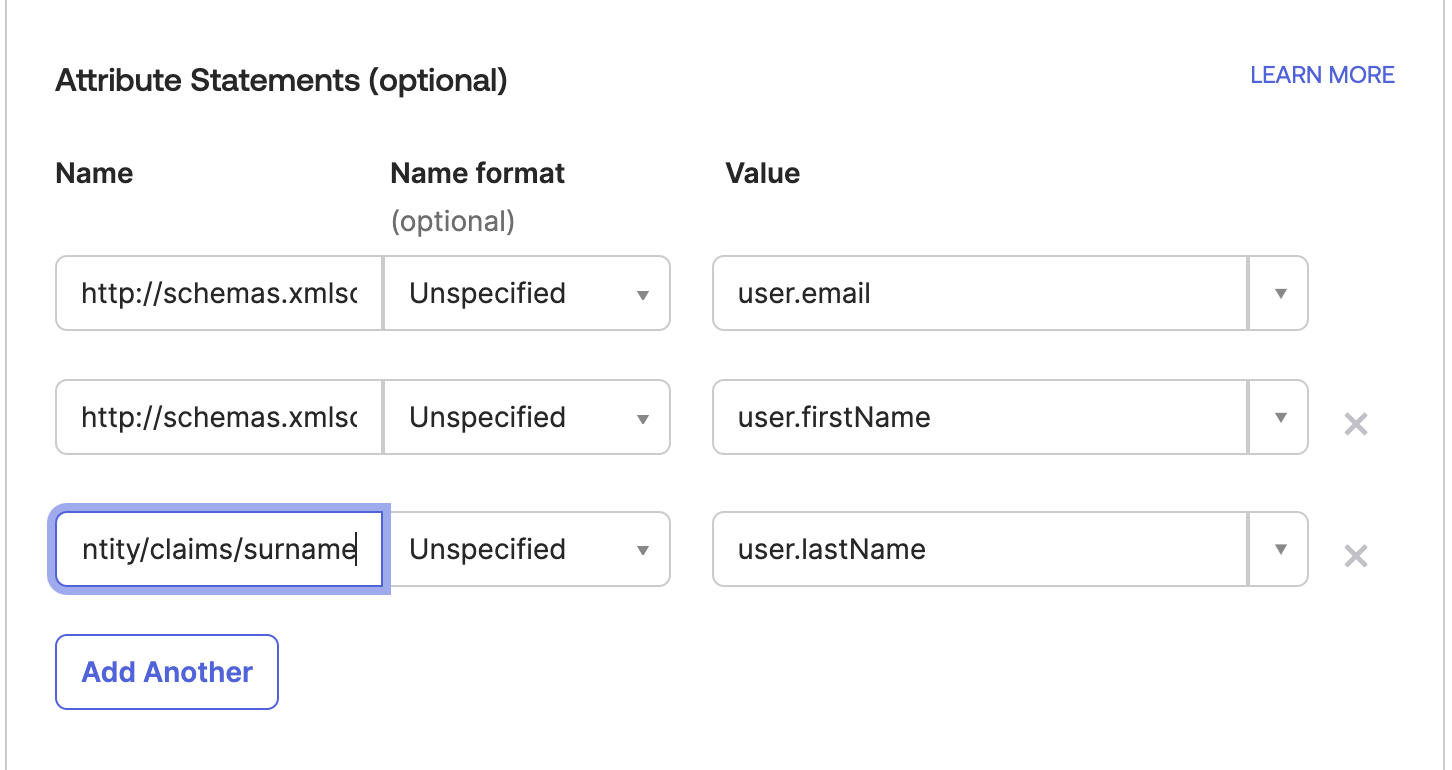
 5. Configure the following `Attribute Statements` to ensure email addresses and names are correctly populated in Gable.
* **`http://schemas.xmlsoap.org/ws/2005/05/identity/claims/emailaddress`**: `user.email`
* **`http://schemas.xmlsoap.org/ws/2005/05/identity/claims/givenname`**: `user.firstName`
* **`http://schemas.xmlsoap.org/ws/2005/05/identity/claims/surname`**: `user.lastName`
You can leave the Name Format as `Unspecified` for each.
5. Configure the following `Attribute Statements` to ensure email addresses and names are correctly populated in Gable.
* **`http://schemas.xmlsoap.org/ws/2005/05/identity/claims/emailaddress`**: `user.email`
* **`http://schemas.xmlsoap.org/ws/2005/05/identity/claims/givenname`**: `user.firstName`
* **`http://schemas.xmlsoap.org/ws/2005/05/identity/claims/surname`**: `user.lastName`
You can leave the Name Format as `Unspecified` for each.
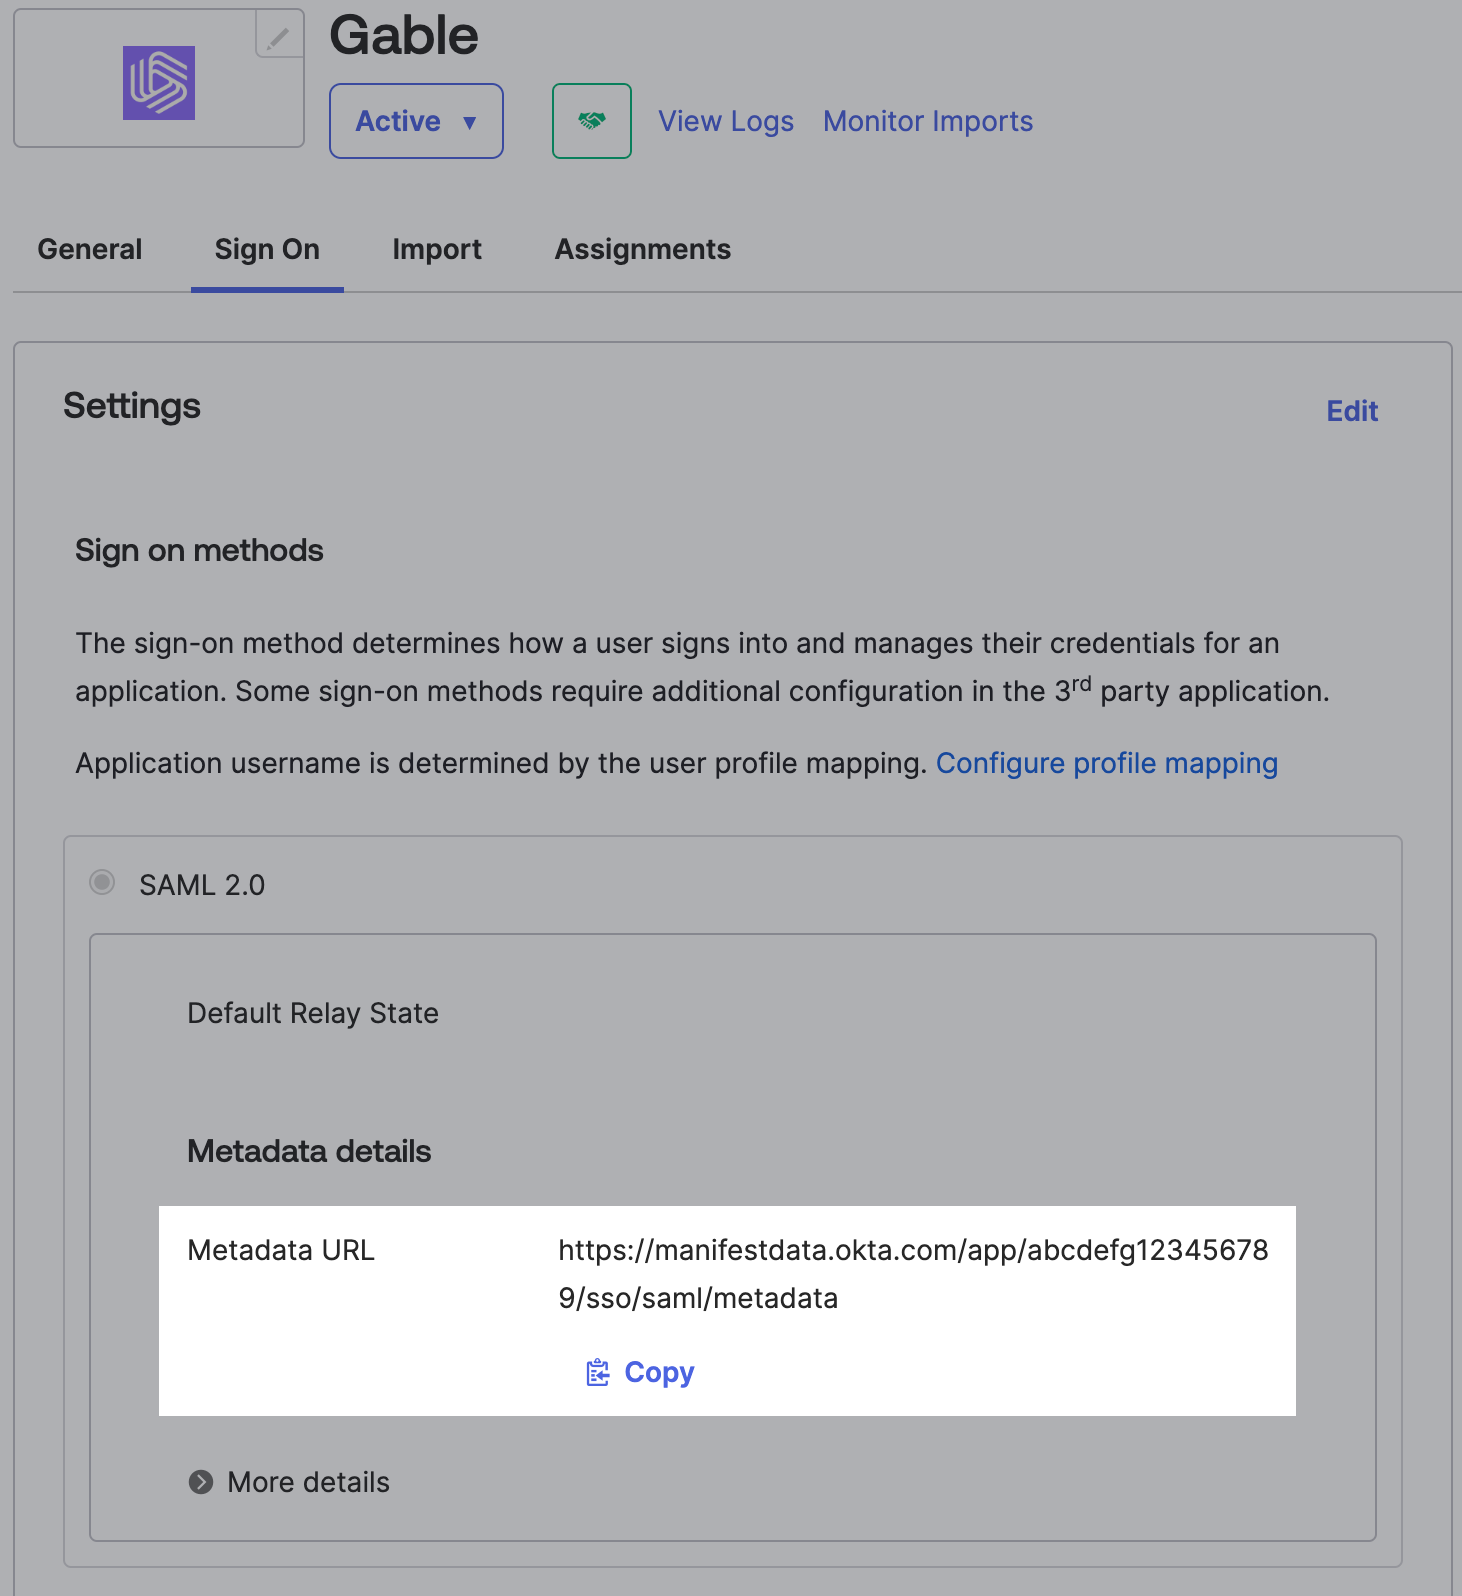
 6. Continue through the `Feedback` prompt to complete creating the app! Once the app is created, navigate to the `Sign On` tab and copy the `Metadata URL` - you'll need this in the next step to configure SSO in Gable.
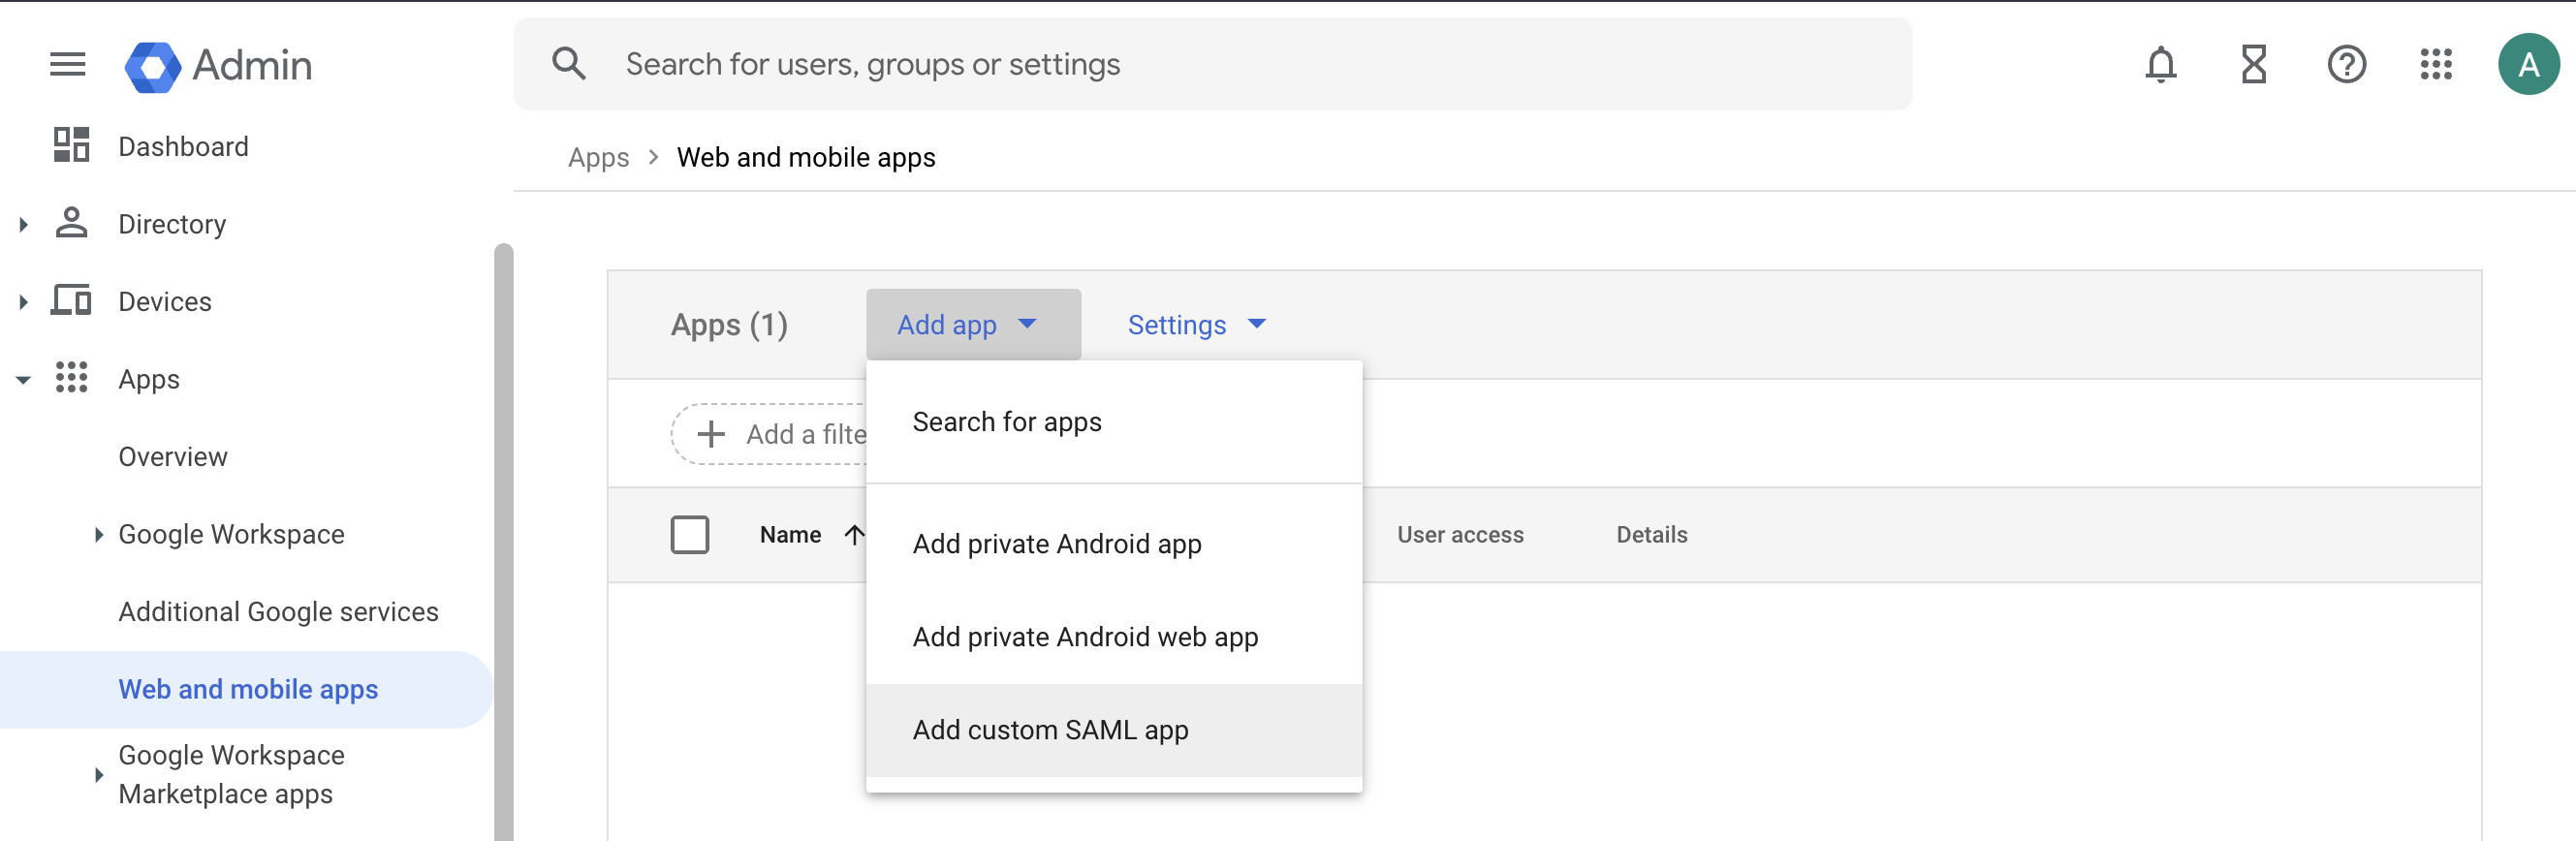
 1. Log in to the Google Admin dashboard, select `Apps` from the sidebar menu, and then select `Web and Mobile Apps` from the following list. Next, select `Add app->Add custom SAML app` from the dropdown menu.
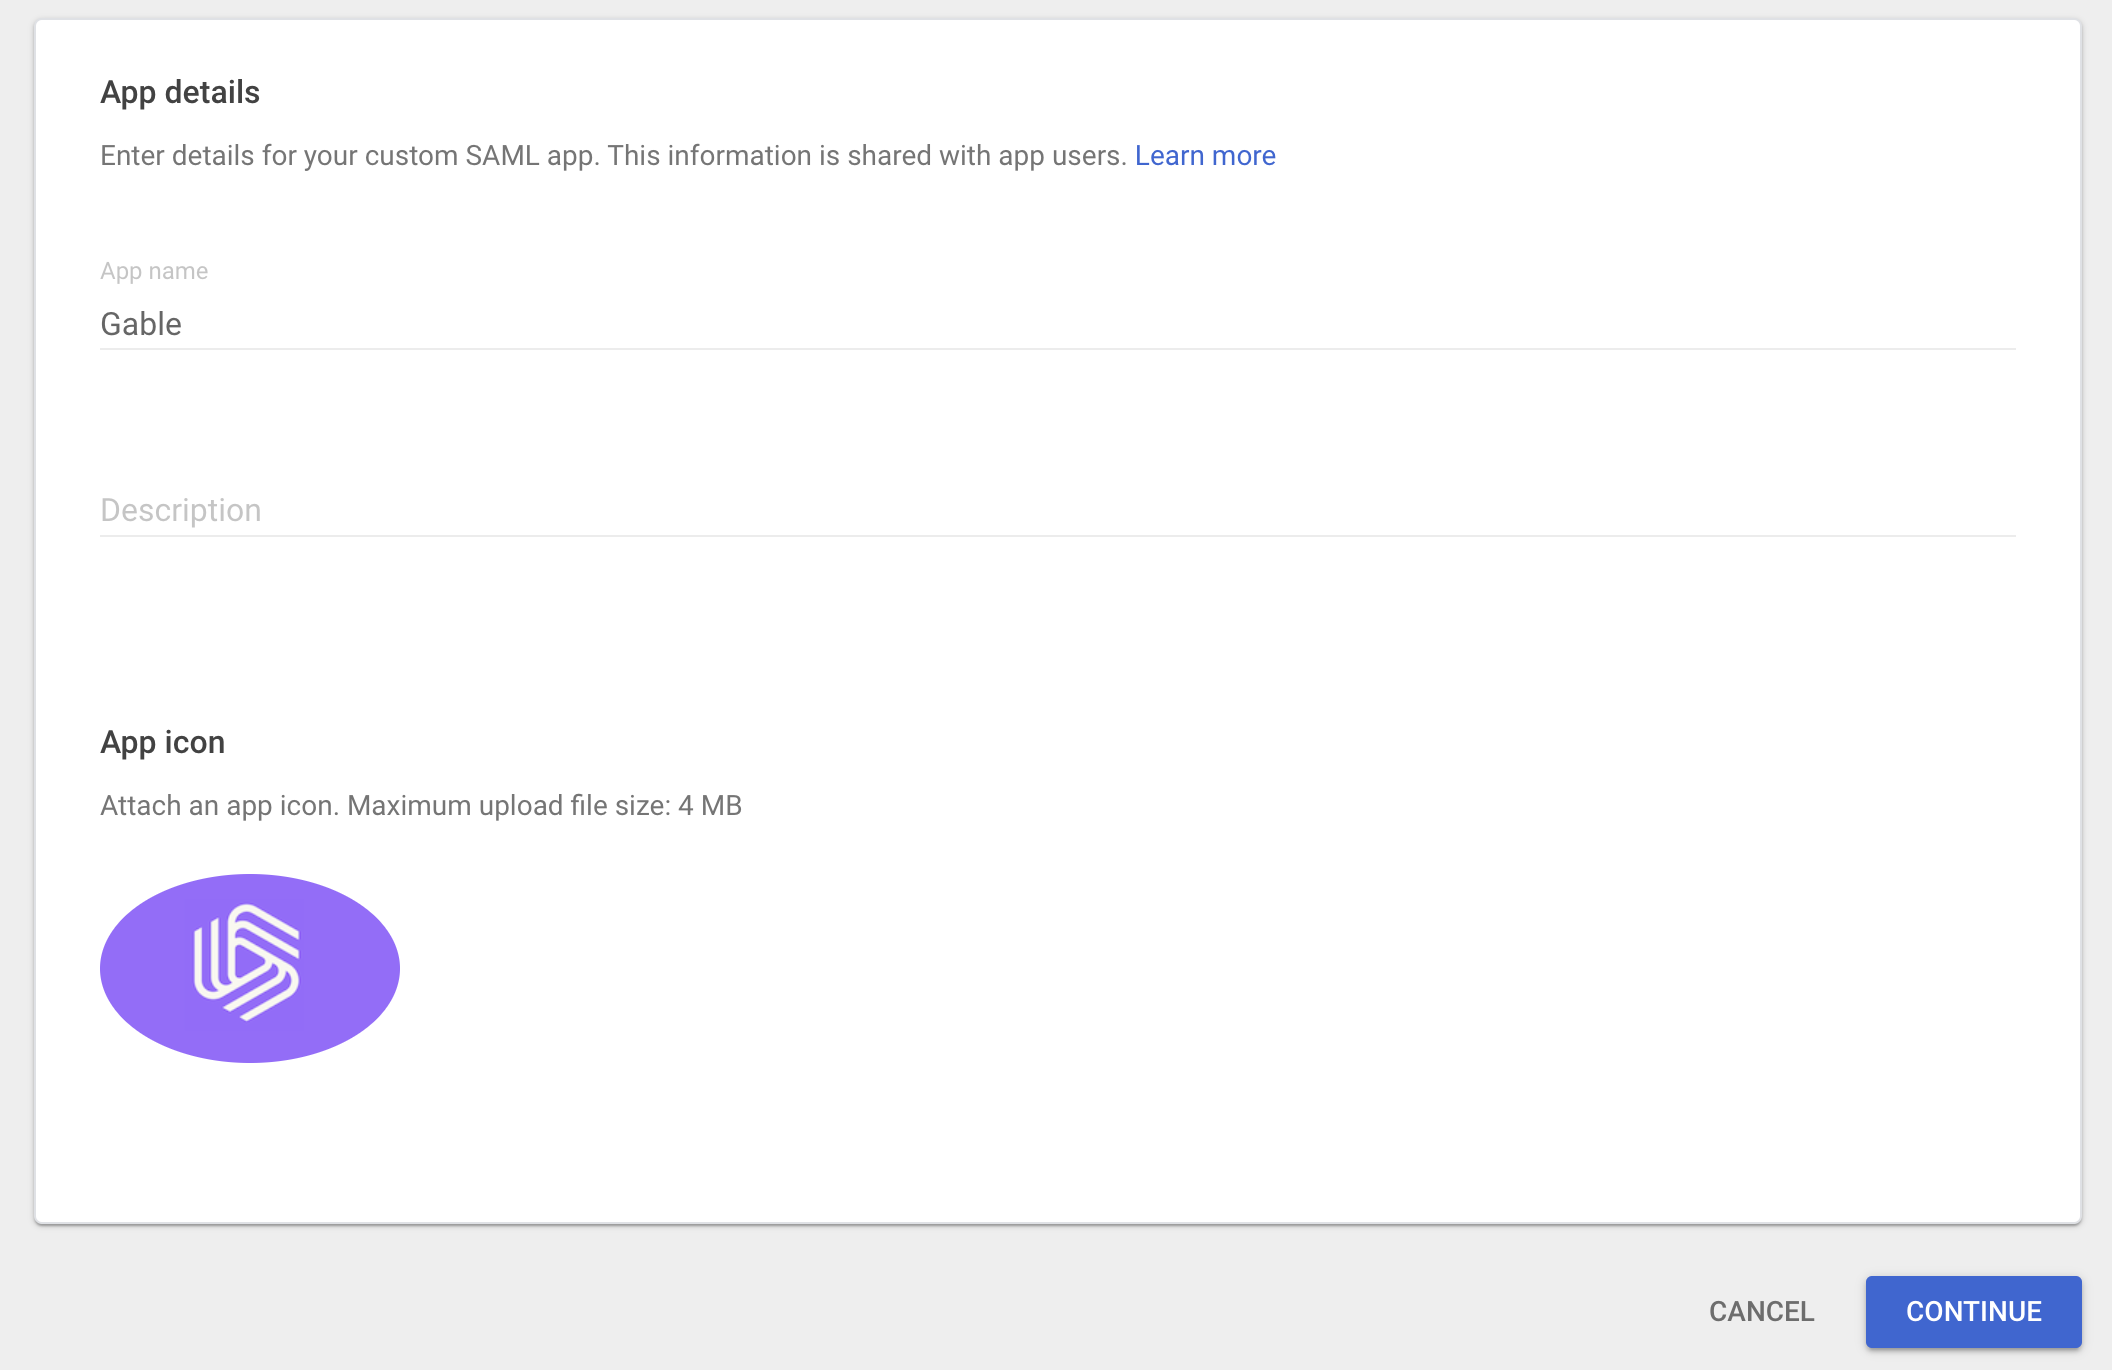
 2. Name the app `Gable` and set the logo (you can download the logo [here](../assets/sso/GableLogo_google.png)).
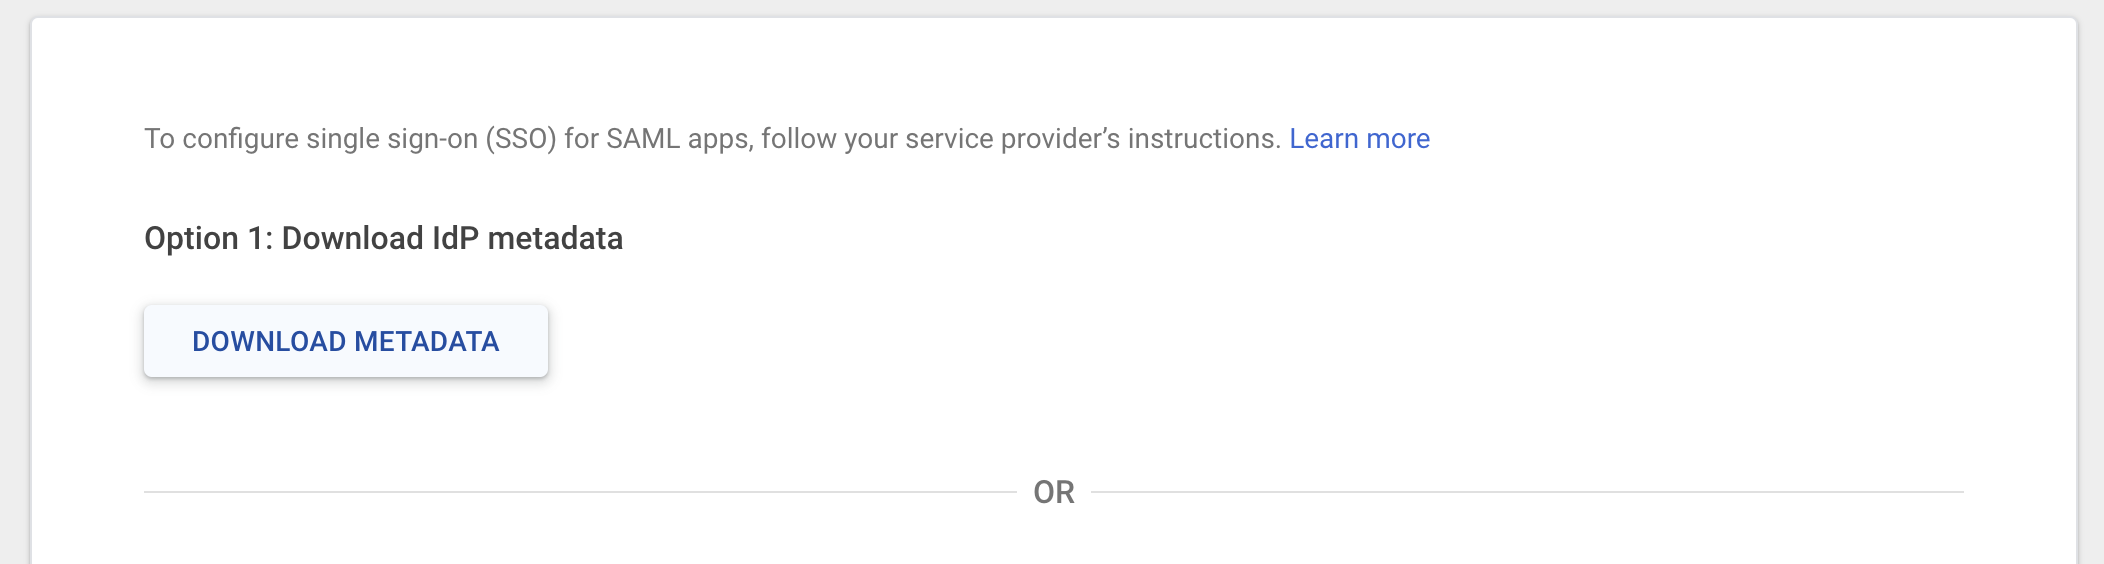
 3. Download the Idp metadata, you'll need this XML file to configure SSO in Gable. You'll have the option to re-download the file once th application is created, so don't worry if you missed this step.
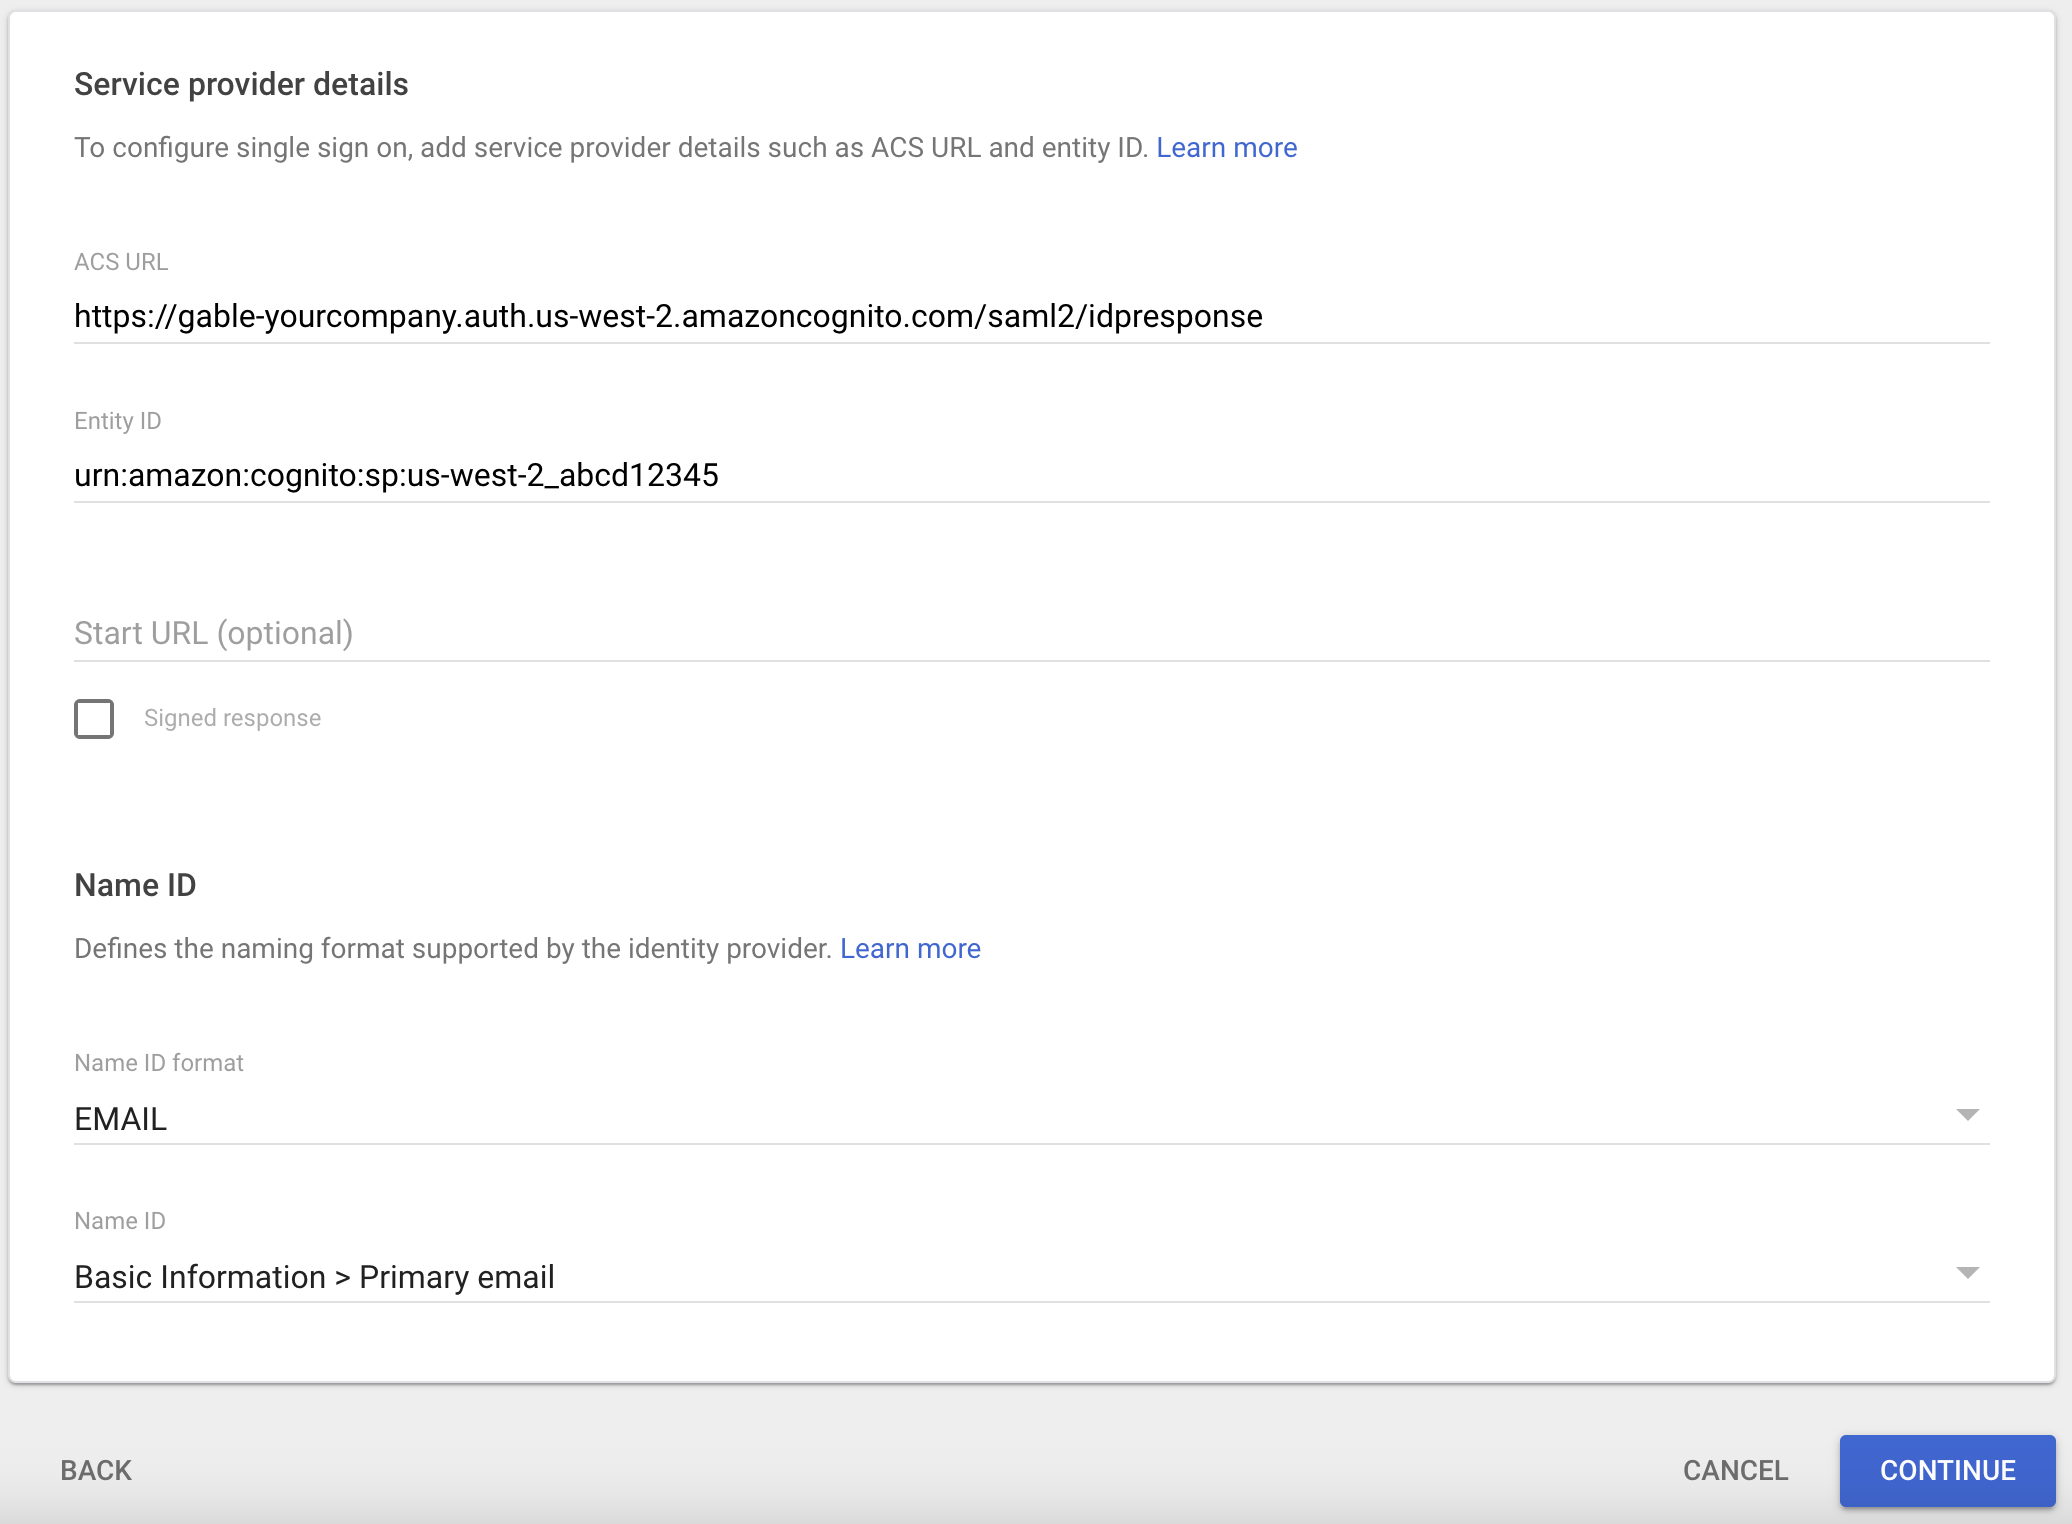
 4. Fill out the `Service provider details` form using the values you retrieved earlier from Gable's `Settings->SSO` page.
* **ACS URL**: Use the `Single Sign-On URL (ACS URL)` value from Gable's `Settings->SSO` page
* **Entity ID**: Use the `Audience URI (SP Entity ID)` value from Gable's `Settings->SSO` page
* **Name ID format**: set to `EMAIL`
* **Name ID**: set to `Basic Information > Primary email`
4. Fill out the `Service provider details` form using the values you retrieved earlier from Gable's `Settings->SSO` page.
* **ACS URL**: Use the `Single Sign-On URL (ACS URL)` value from Gable's `Settings->SSO` page
* **Entity ID**: Use the `Audience URI (SP Entity ID)` value from Gable's `Settings->SSO` page
* **Name ID format**: set to `EMAIL`
* **Name ID**: set to `Basic Information > Primary email`
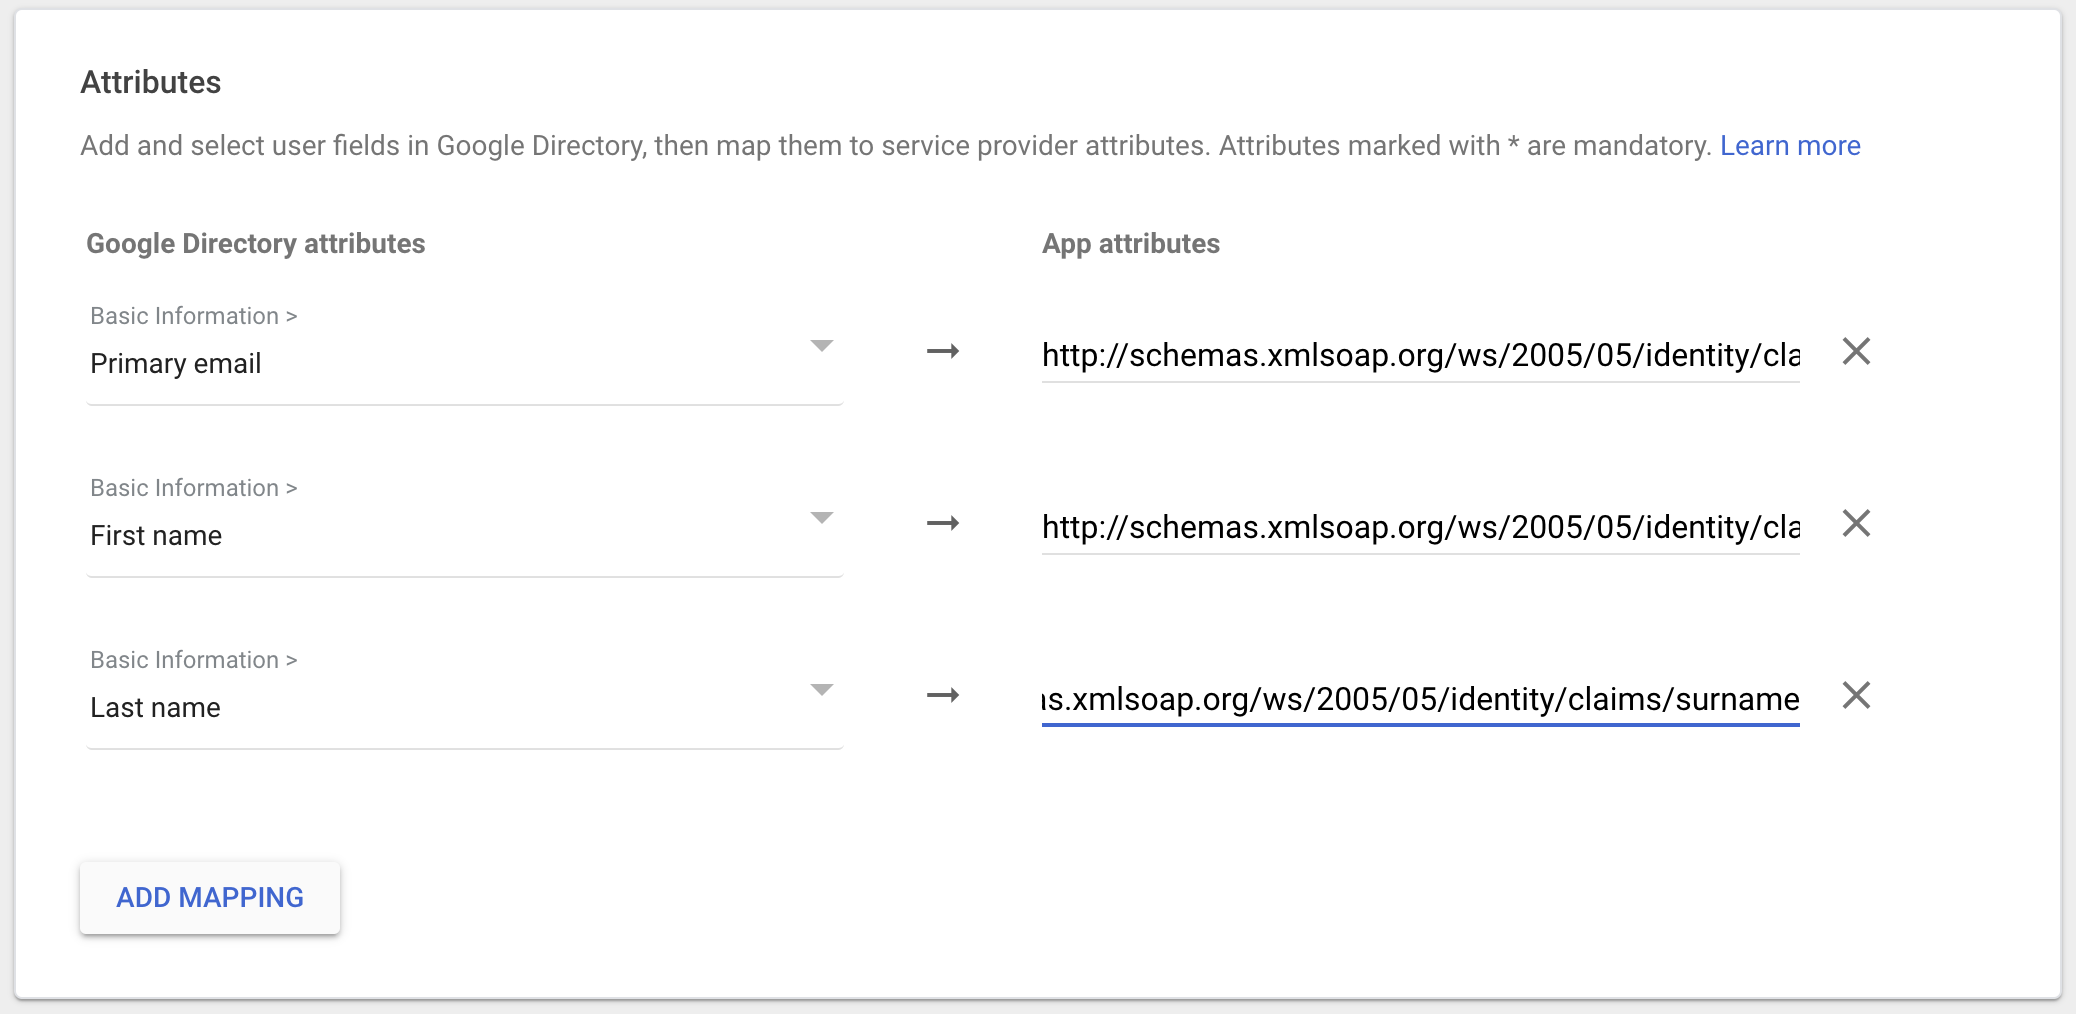
 5. Configure the following `Attribute Statements` to ensure email addresses, and names are correctly populated in Gable.
* **Primary email**: `http://schemas.xmlsoap.org/ws/2005/05/identity/claims/emailaddress`
* **First name**: `http://schemas.xmlsoap.org/ws/2005/05/identity/claims/givenname`
* **Last name**: `http://schemas.xmlsoap.org/ws/2005/05/identity/claims/surname`
You can leave the Name Format as `Unspecified` for each.
5. Configure the following `Attribute Statements` to ensure email addresses, and names are correctly populated in Gable.
* **Primary email**: `http://schemas.xmlsoap.org/ws/2005/05/identity/claims/emailaddress`
* **First name**: `http://schemas.xmlsoap.org/ws/2005/05/identity/claims/givenname`
* **Last name**: `http://schemas.xmlsoap.org/ws/2005/05/identity/claims/surname`
You can leave the Name Format as `Unspecified` for each.
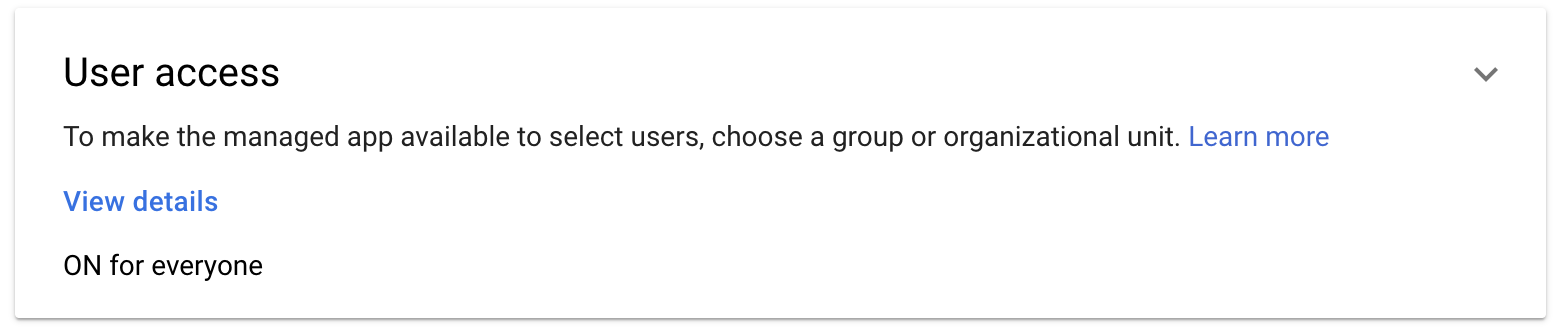
 6. You'll need to configure user access before anyone at your company can login to Gable using SSO. Depending on your company policies, you may choose to enable access for everyone, or only select groups.
 If your identity provider is not listed, you should be able to find their documentation for creating a SAML based application, and please reach out to [support@gable.ai](mailto:support@gable.ai) if you'd like to have your IdP added!
After completing the SAML app setup, your IdP should provide you with either a metadata URL, or metadata XML file for you to download. The metadata URL or file will be used in the next step to configure SSO in Gable.
### 3. Configure SSO In Gable
Using either the metadata URL or file provided by your IdP, configure the SSO integration in Gable.
1. Navigate to the `Settings->SSO` page and in the Enable SSO section, click the `Enable` button.
If your identity provider is not listed, you should be able to find their documentation for creating a SAML based application, and please reach out to [support@gable.ai](mailto:support@gable.ai) if you'd like to have your IdP added!
After completing the SAML app setup, your IdP should provide you with either a metadata URL, or metadata XML file for you to download. The metadata URL or file will be used in the next step to configure SSO in Gable.
### 3. Configure SSO In Gable
Using either the metadata URL or file provided by your IdP, configure the SSO integration in Gable.
1. Navigate to the `Settings->SSO` page and in the Enable SSO section, click the `Enable` button.
 2. Enter name for your SSO integration - this name will be what users see when they land at Gable's sign-in portal.
**Note**: The following strings cannot be used as the integration name as they're reserved words in our identity management platform: `Google`, `SAML`.
Depending on your identity provider, either enter the metadata URL they provided or upload the metadata file you downloaded when creating the SAML app.
2. Enter name for your SSO integration - this name will be what users see when they land at Gable's sign-in portal.
**Note**: The following strings cannot be used as the integration name as they're reserved words in our identity management platform: `Google`, `SAML`.
Depending on your identity provider, either enter the metadata URL they provided or upload the metadata file you downloaded when creating the SAML app.
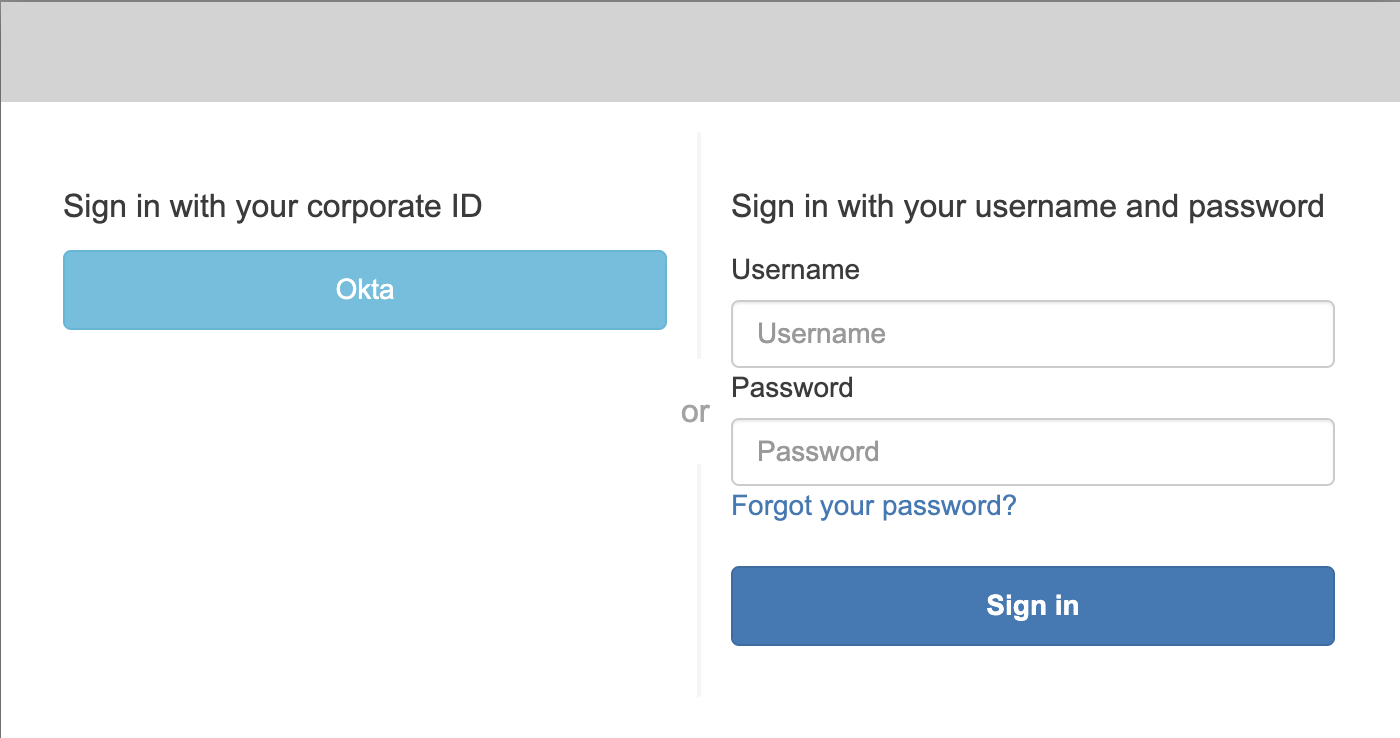
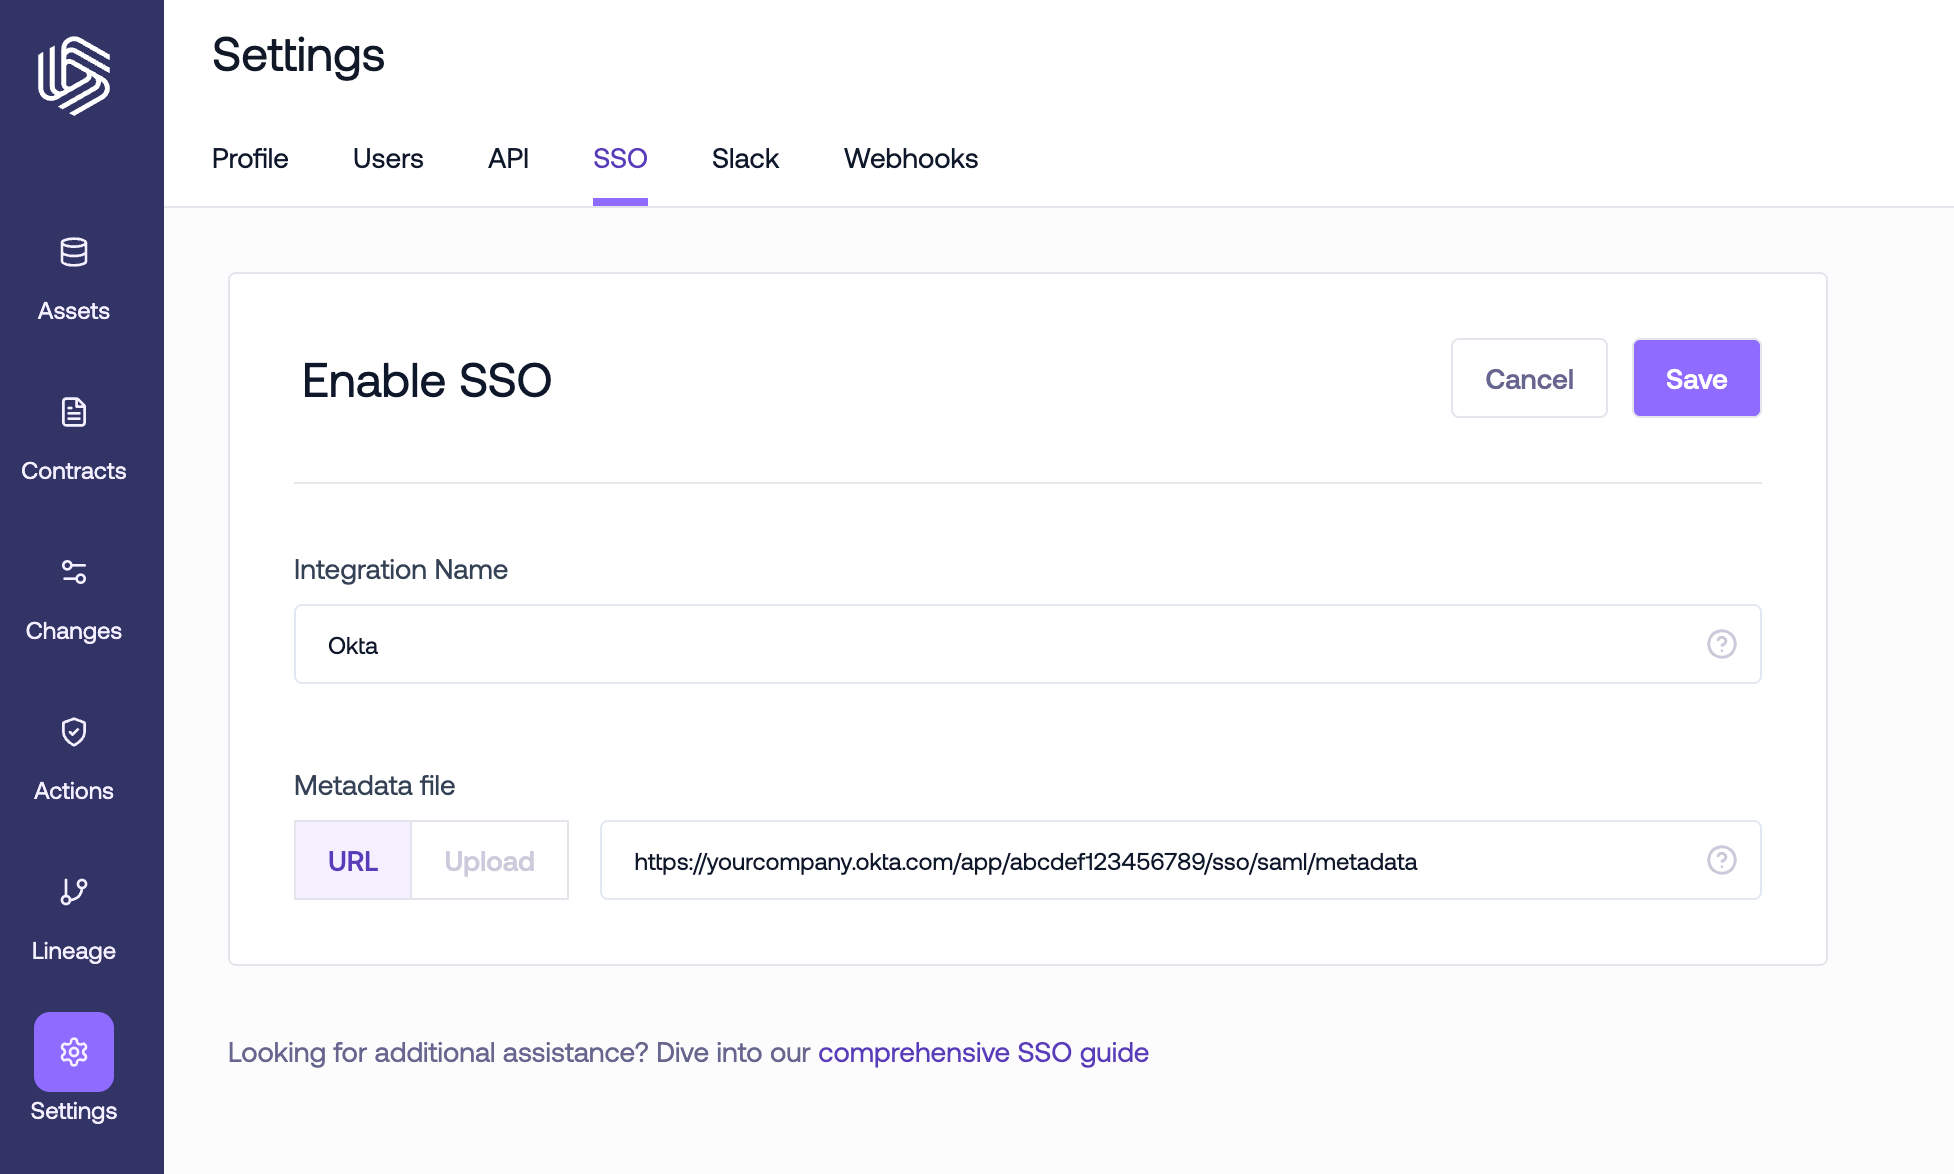 3. Once you save the SSO configuration, users will have the option to sign in through your identity provider when they land on Gable's sign-in portal.