Steps to configure Single Sign-On
To configure SSO, follow the below steps:1. Retrieve your SAML configuration details
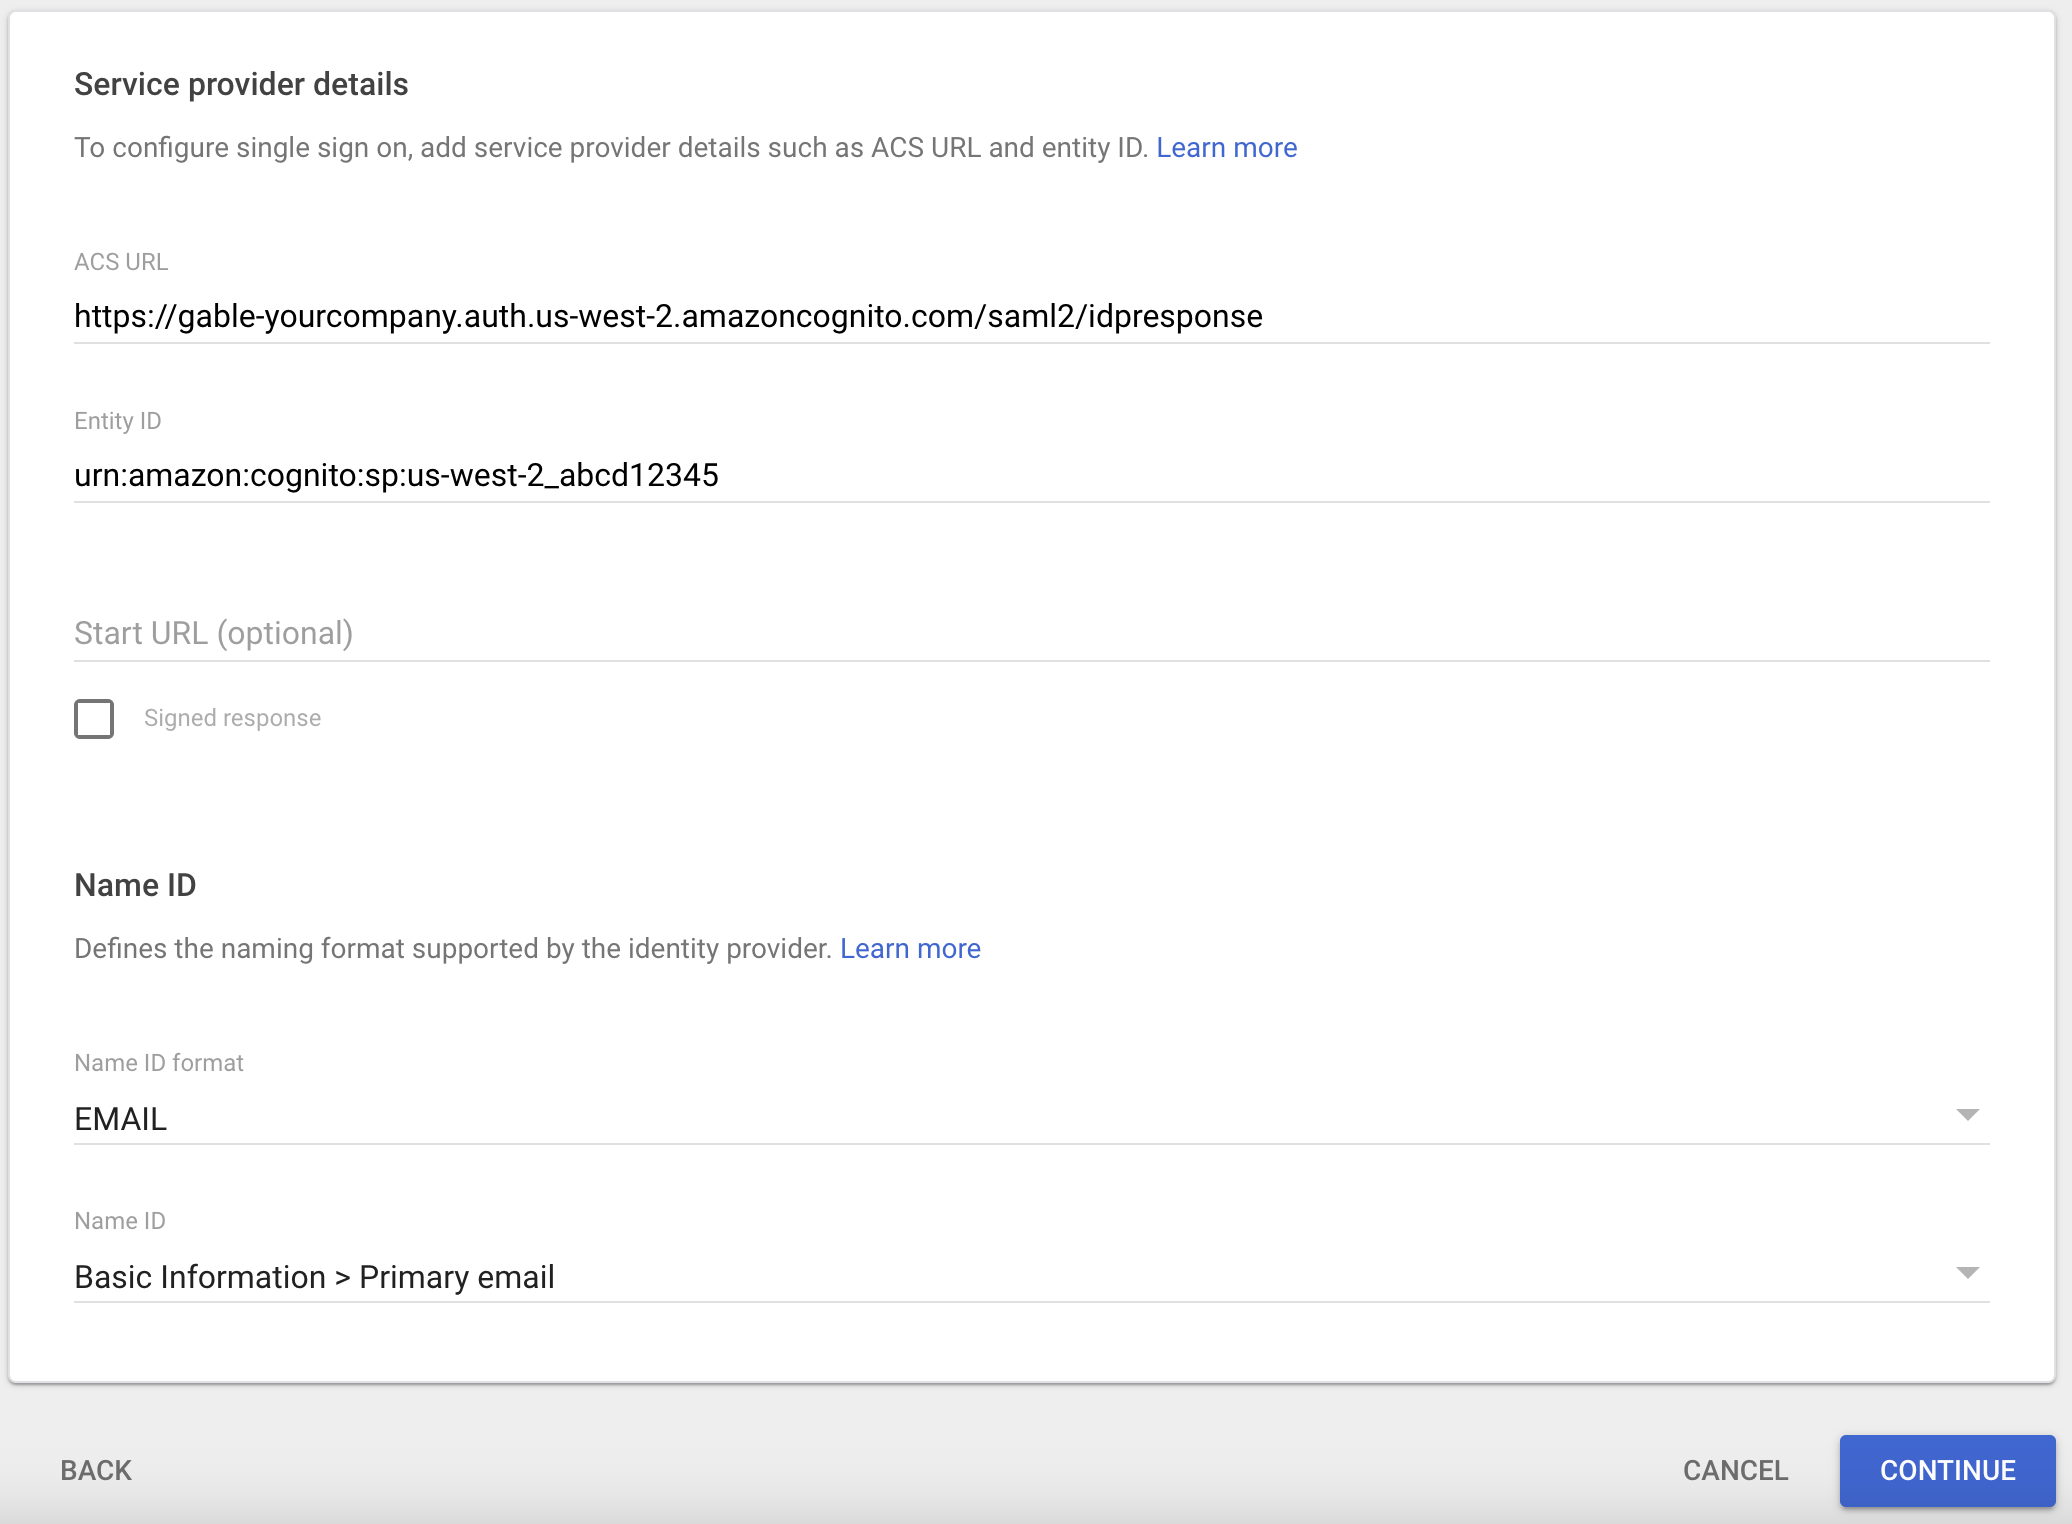
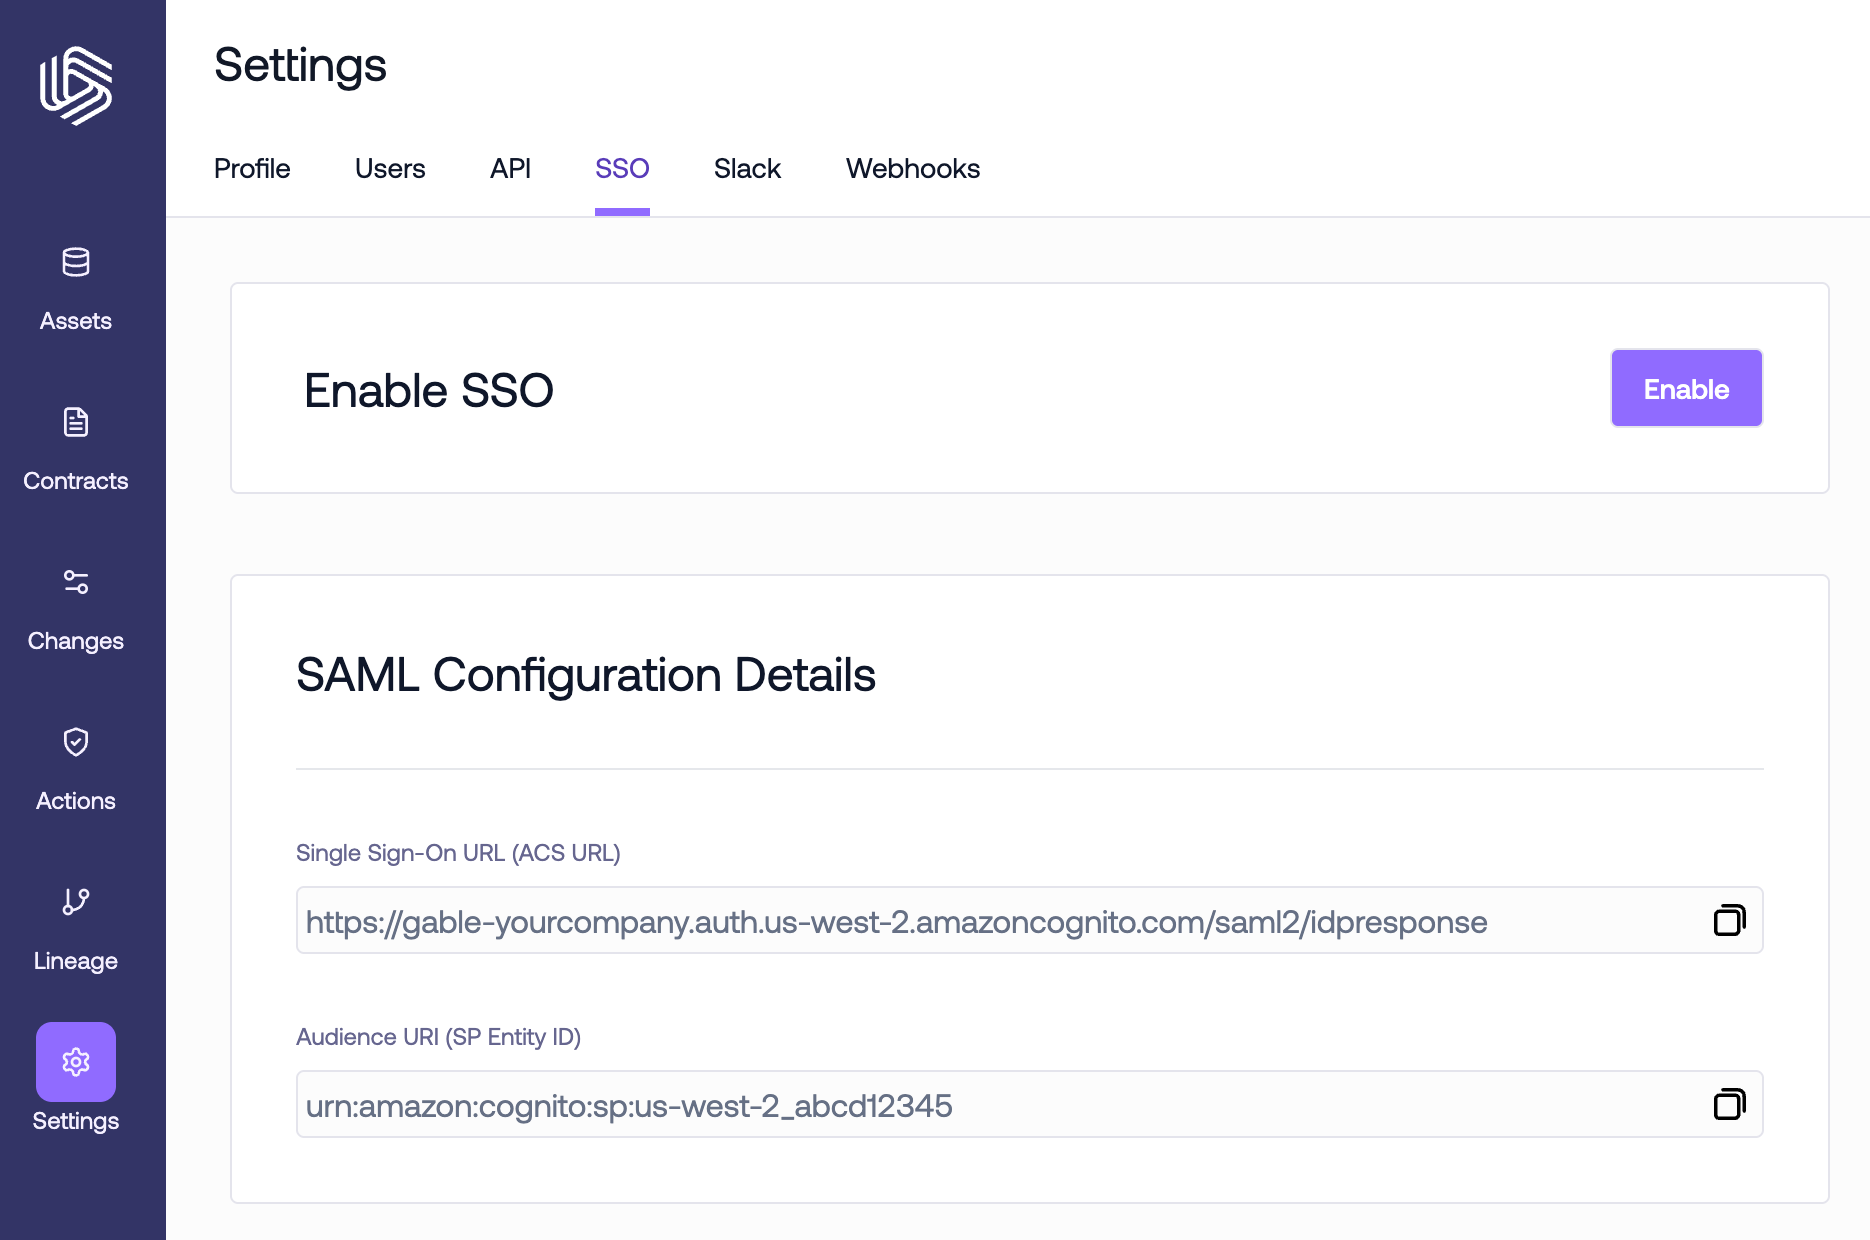
In order to create a new SAML 2.0 application in your identity provider, you’ll need two pieces of information that are specific to your Gable account:- Single Sign-On URL (ACS URL): Also known as the Assertion Consumer Service (ACS) URL or SP sign-in URL. This URL tells your identity provider where it should send SAML Response after authenticating a user.
- Audience URI (SP Entity ID): Also known as the Service Provider (SP) Entity ID or Issuer. This is a unique identifier for your instance of Gable.
Settings->SSO page in the web console to find the values for your account. Keep the tab open or copy the values for use in later steps.

2. Create a new SAML application in your identity provider
Follow the instructions below for your identity provider.- Okta
- Google Workspace
- Other
-
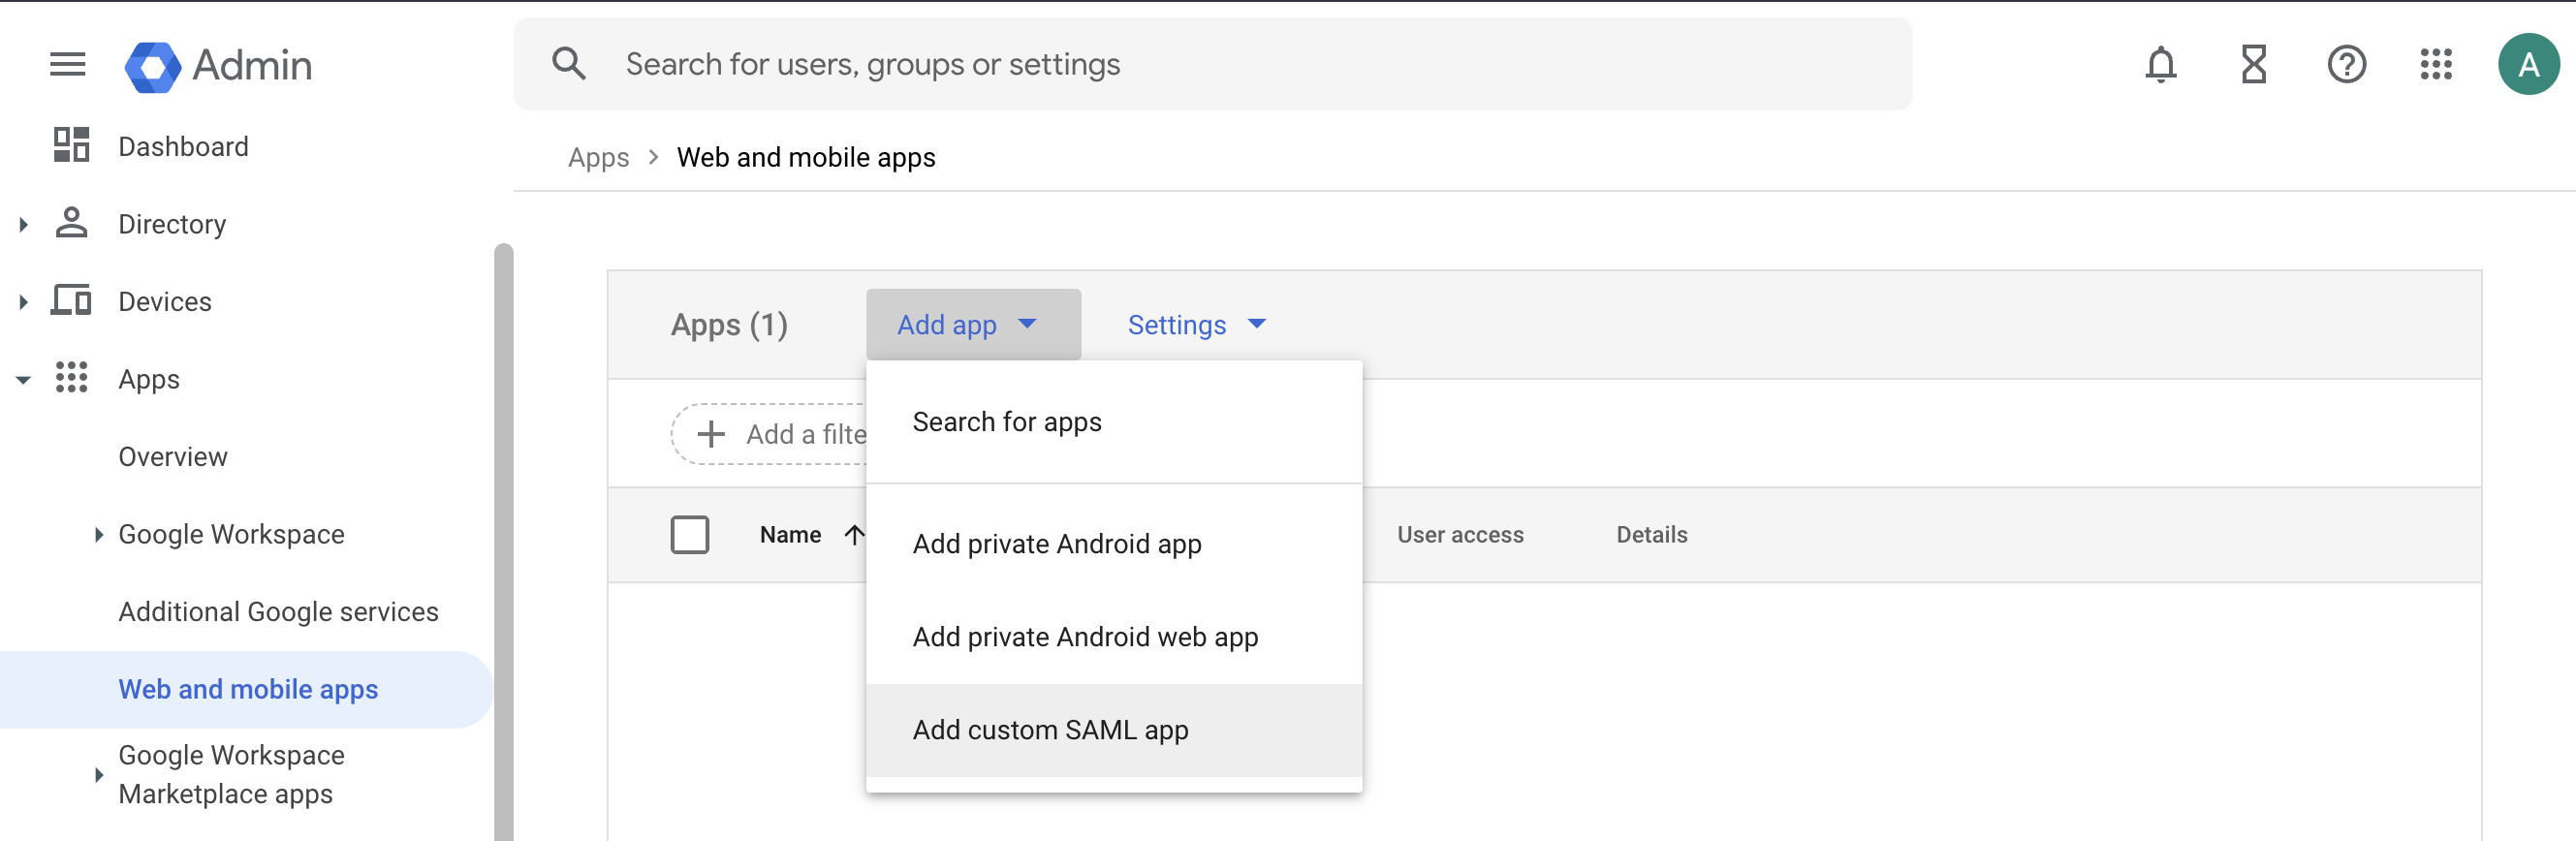
Log in to the Okta Admin portal. From the
Applicationspage, clickCreate App Integration.
-
Select
SAML 2.0.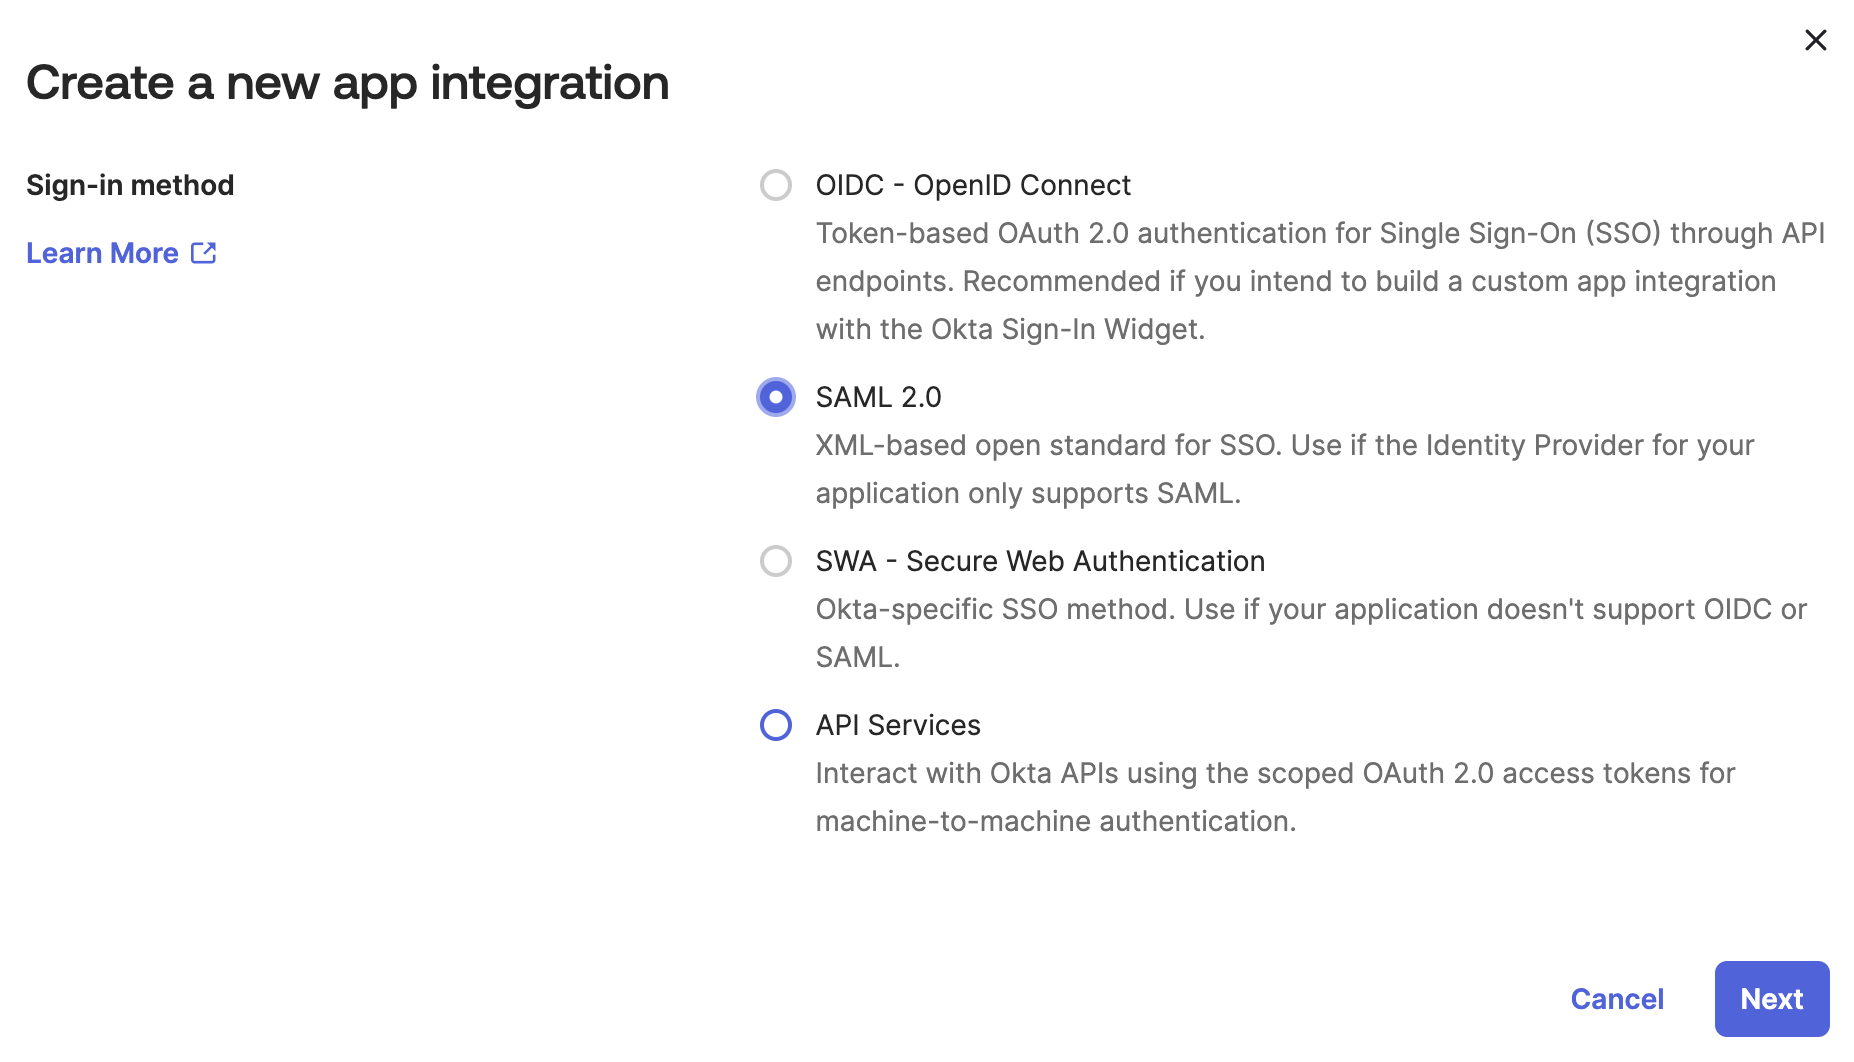
-
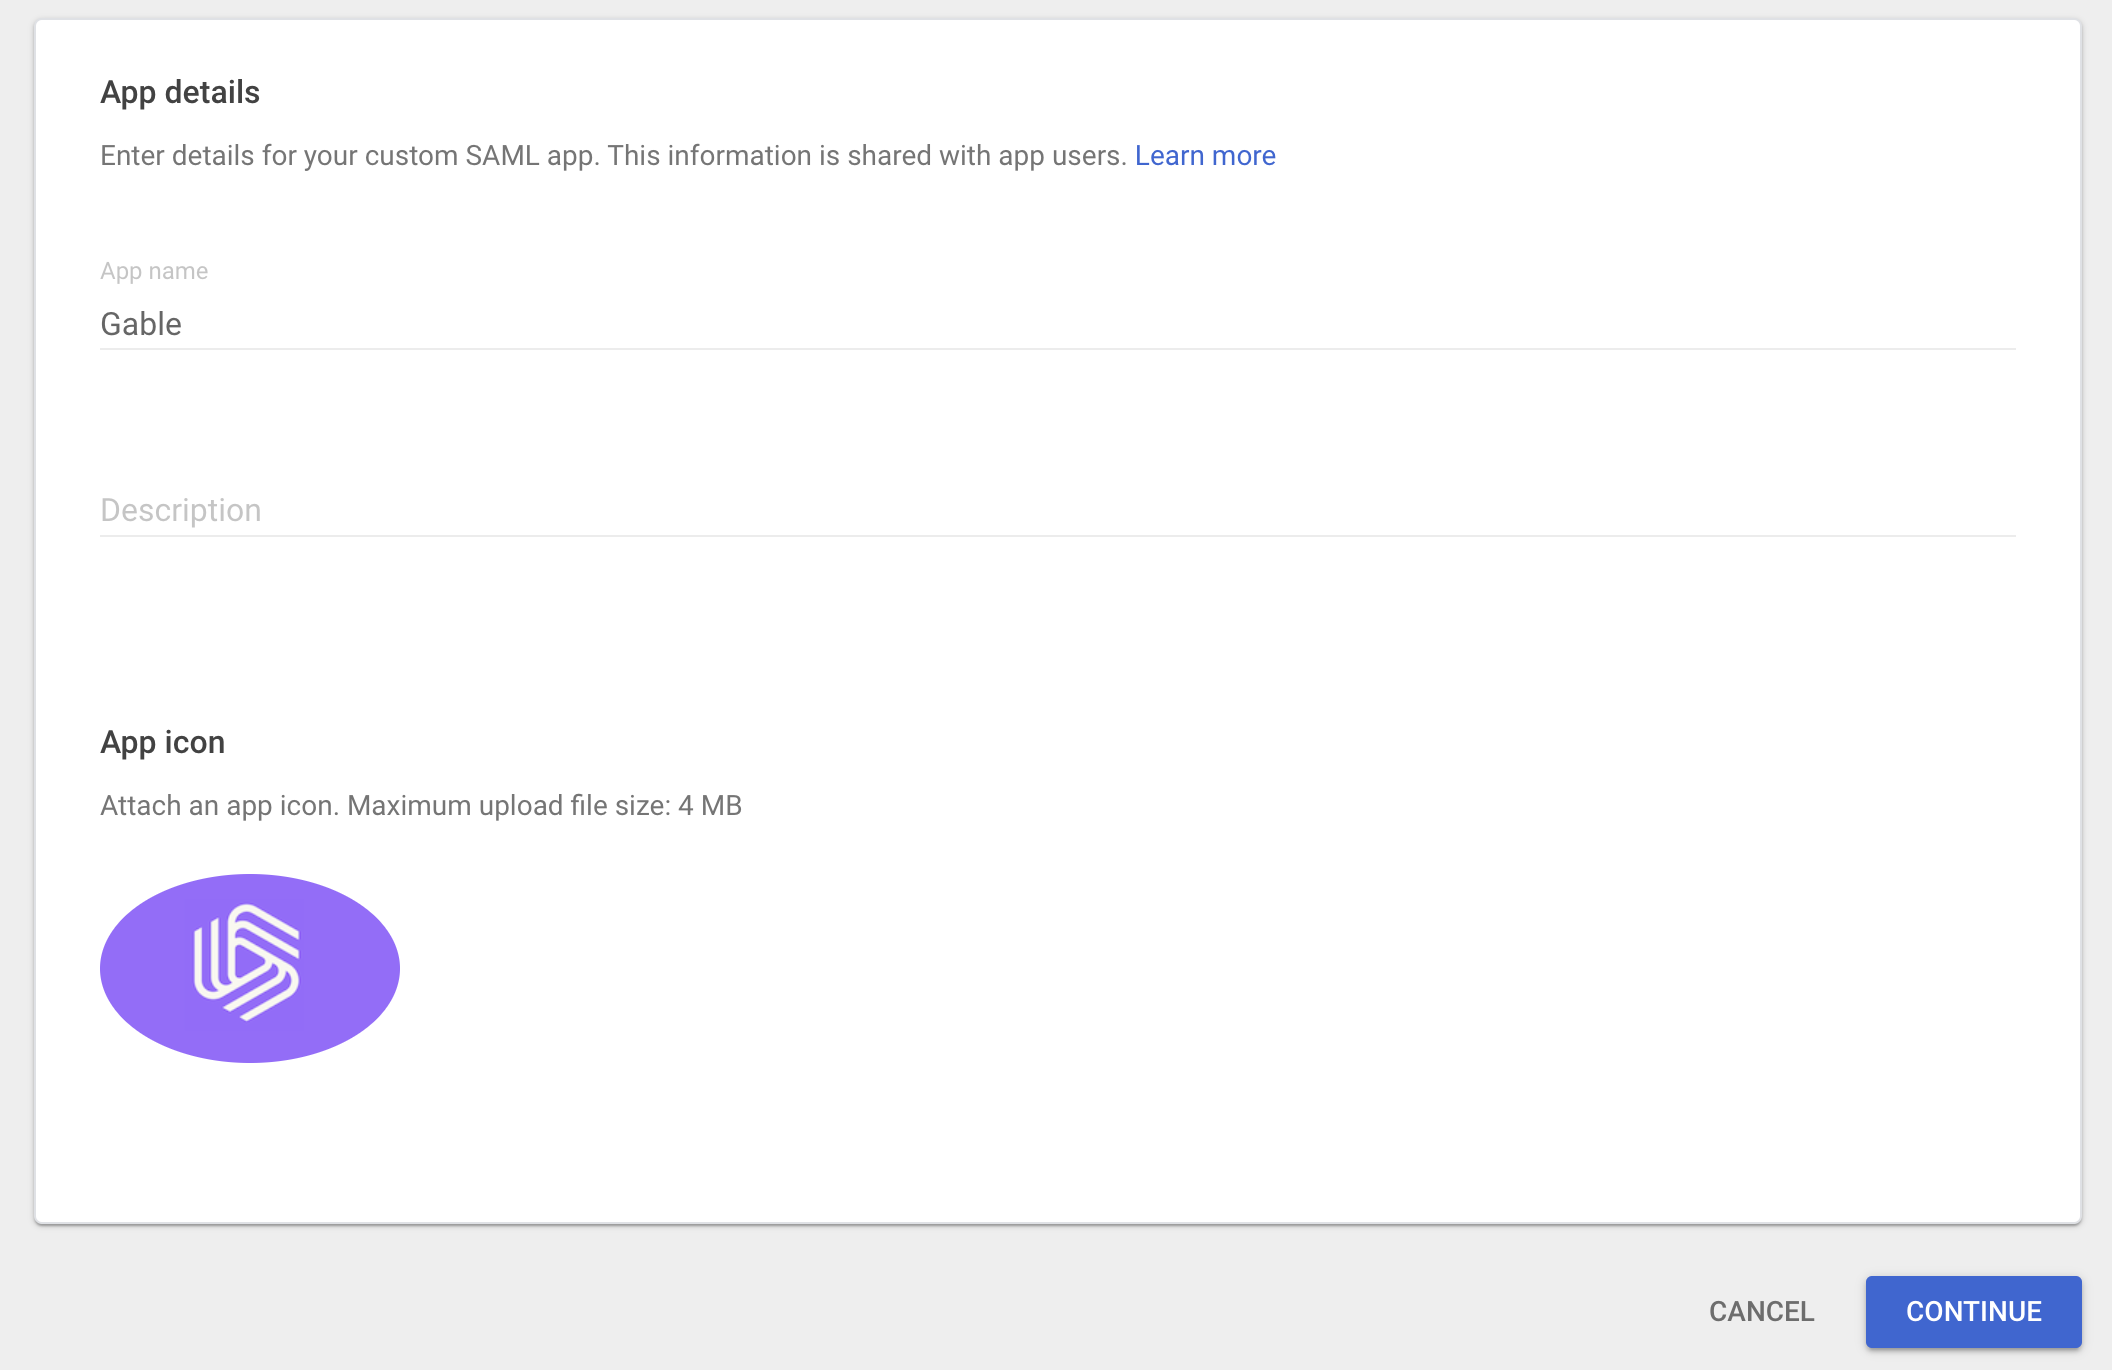
Name the app
Gableand set the logo (you can download the logo here).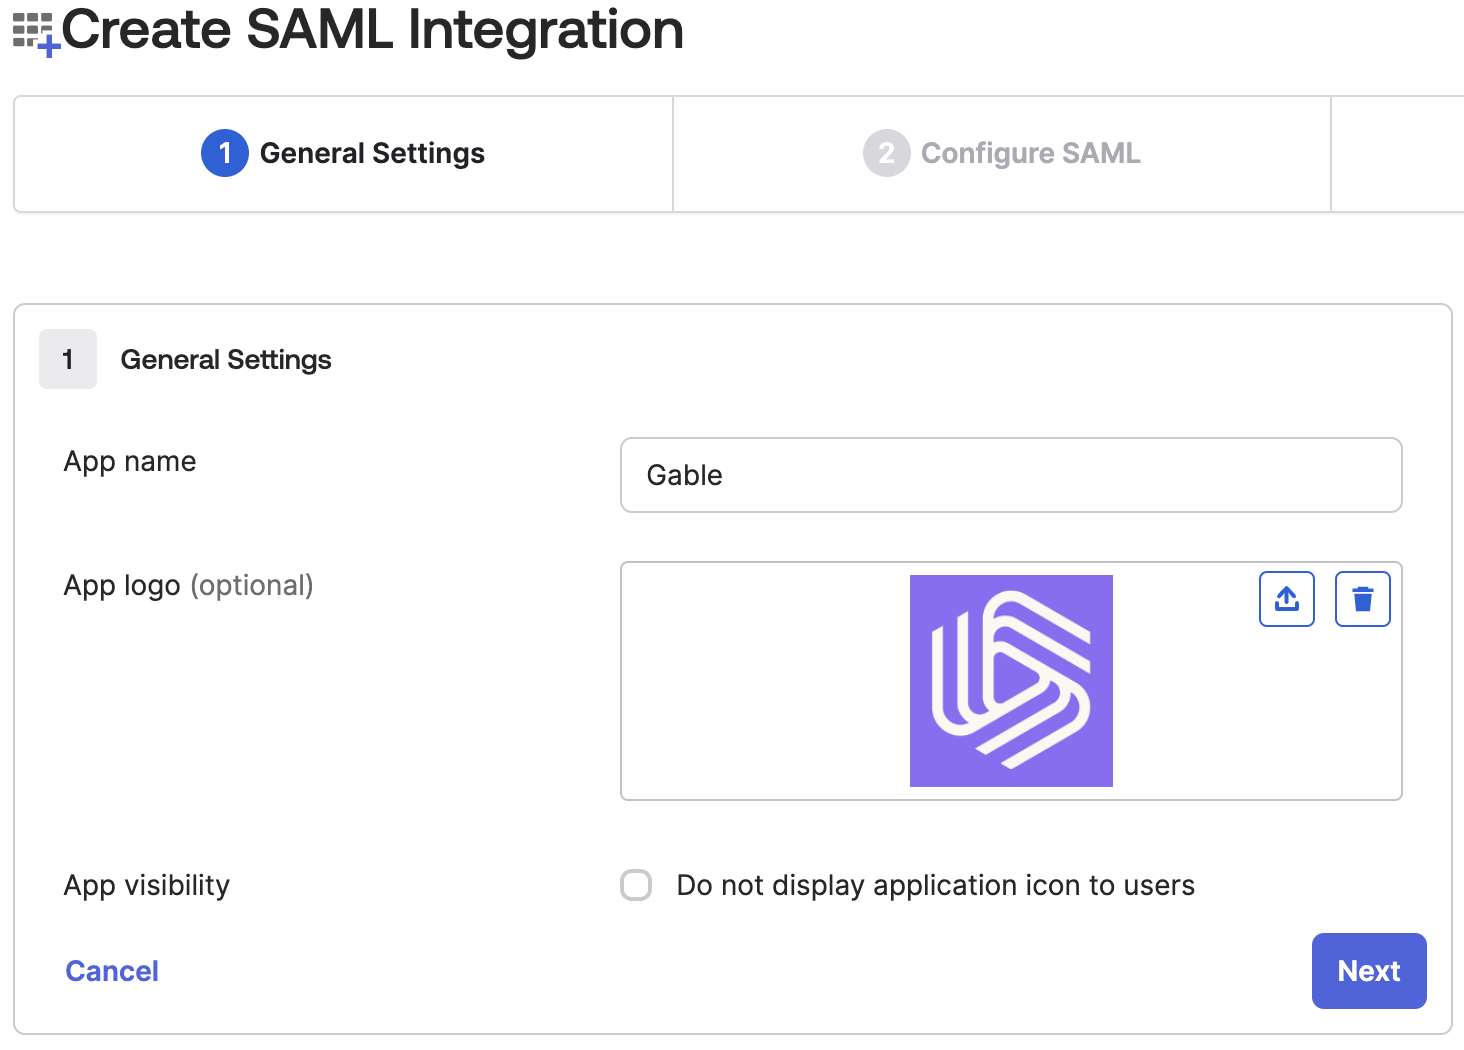
-
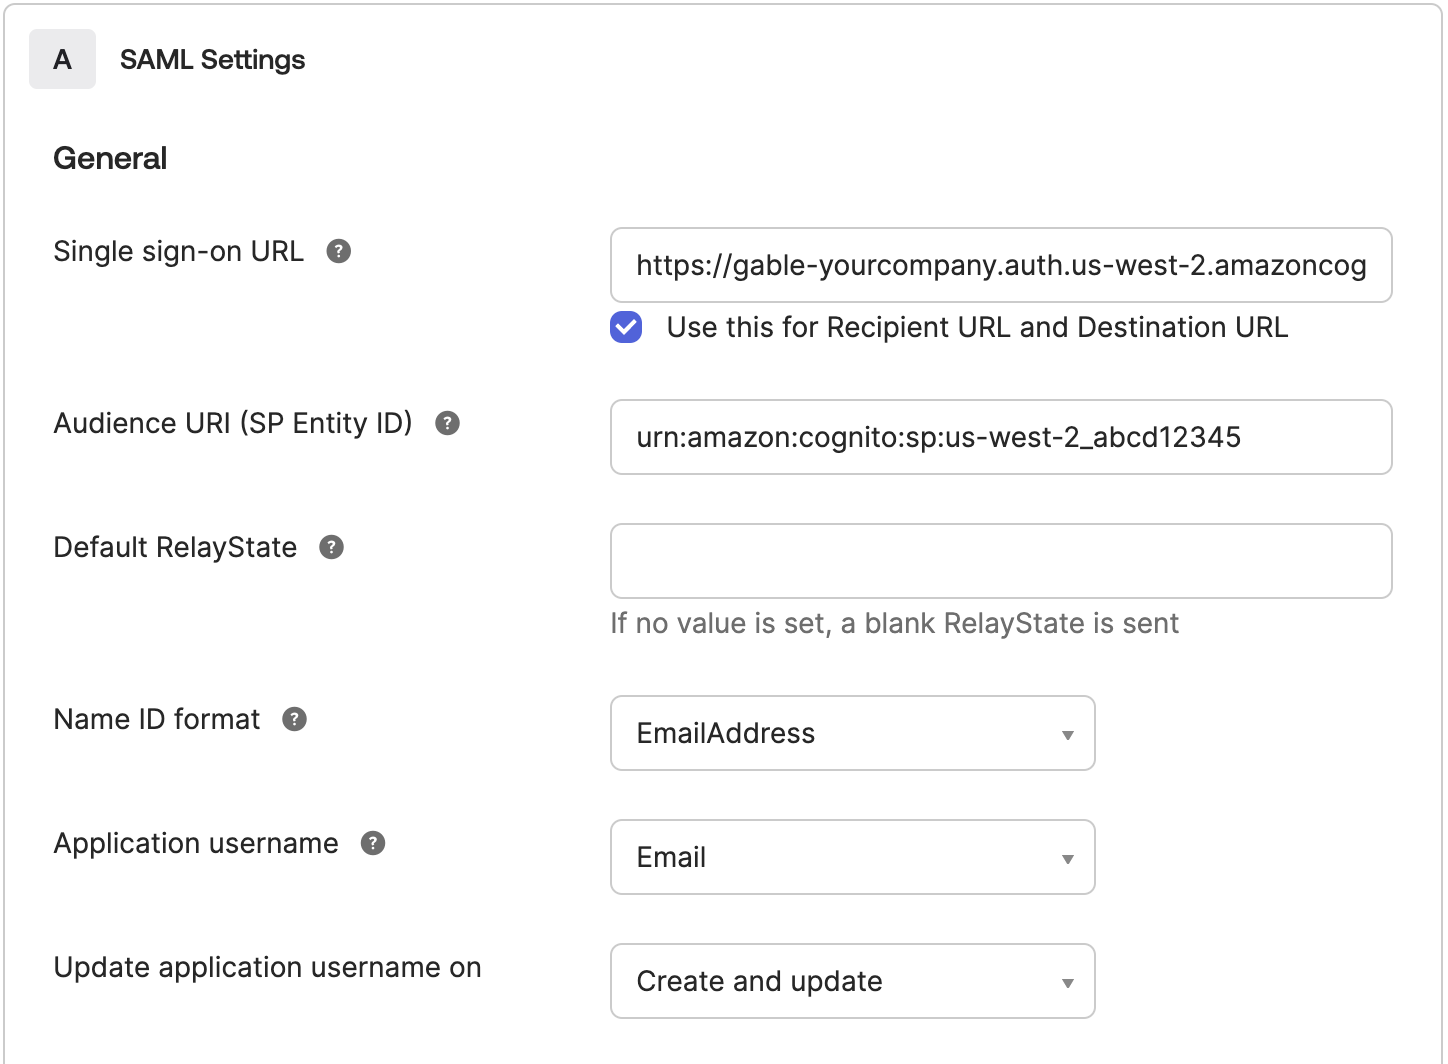
Under the
SAML Settingssection, fill in the form using use the values you retrieved earlier from Gable’sSettings->SSOpage.- Single Sign-On URL: Use the value from Gable’s
Settings->SSOpage - Audience URI (SP Entity ID): Use the value from Gable’s
Settings->SSOpage - Name ID format: set to
EmailAddress - Application username: set to
Email - Update application username on: leave set to
Create and update
- Single Sign-On URL: Use the value from Gable’s
-
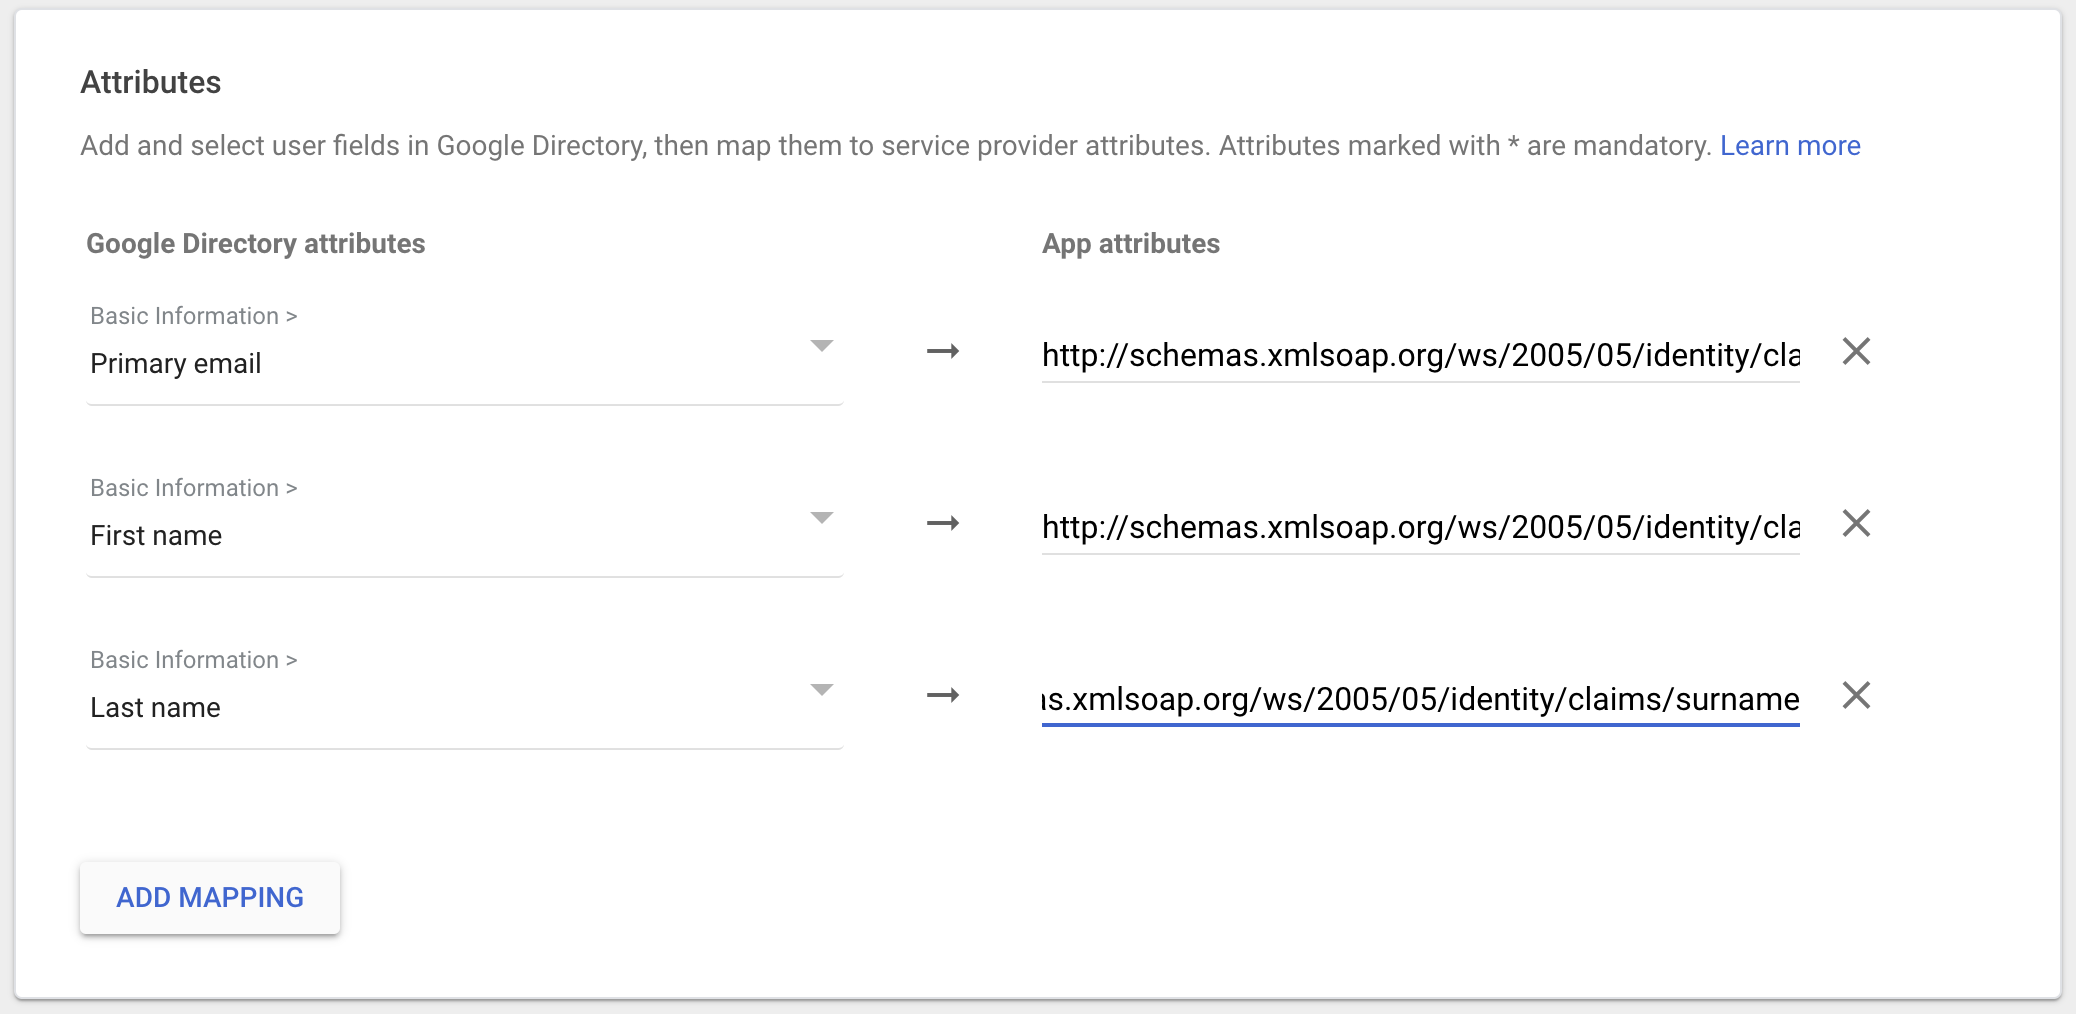
Configure the following
Attribute Statementsto ensure email addresses and names are correctly populated in Gable.http://schemas.xmlsoap.org/ws/2005/05/identity/claims/emailaddress:user.emailhttp://schemas.xmlsoap.org/ws/2005/05/identity/claims/givenname:user.firstNamehttp://schemas.xmlsoap.org/ws/2005/05/identity/claims/surname:user.lastName
Unspecifiedfor each.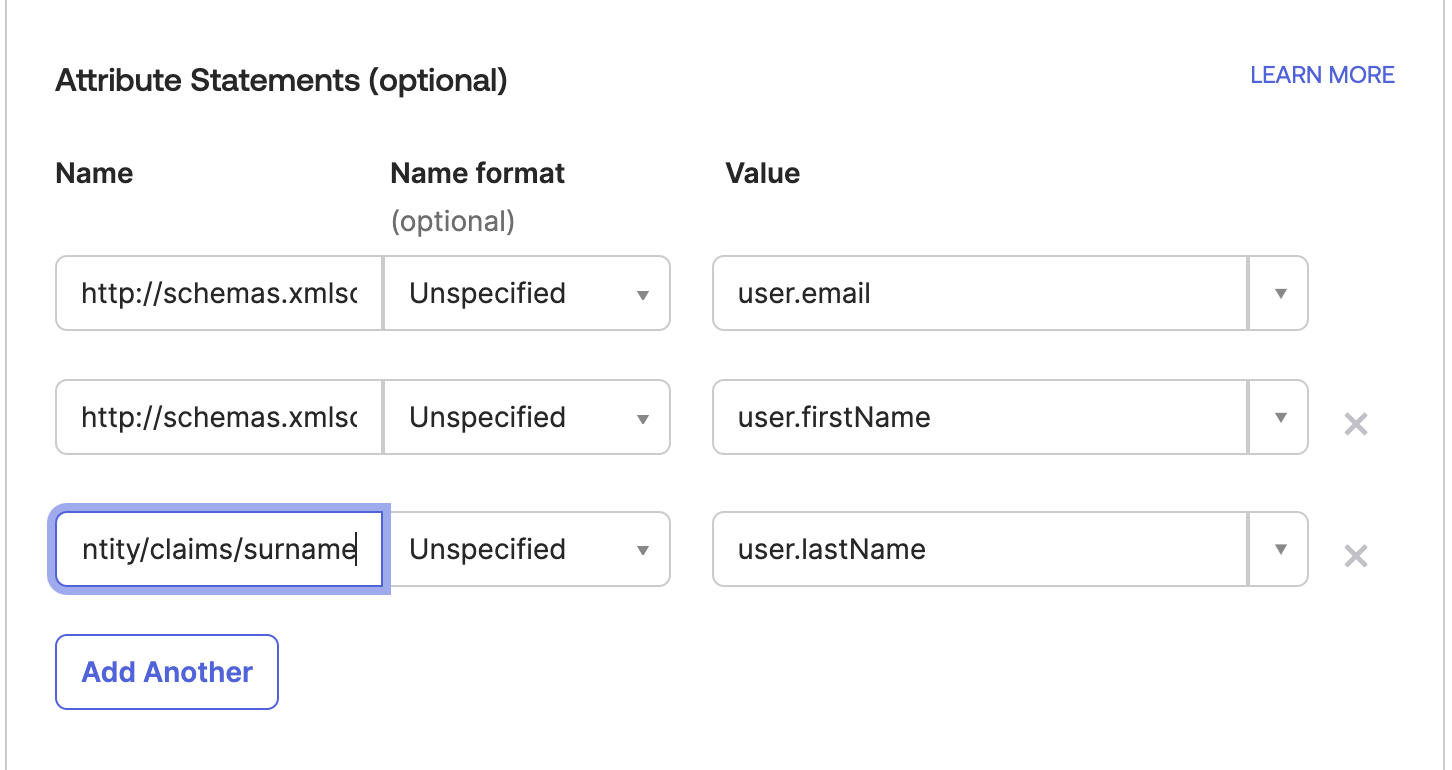
-
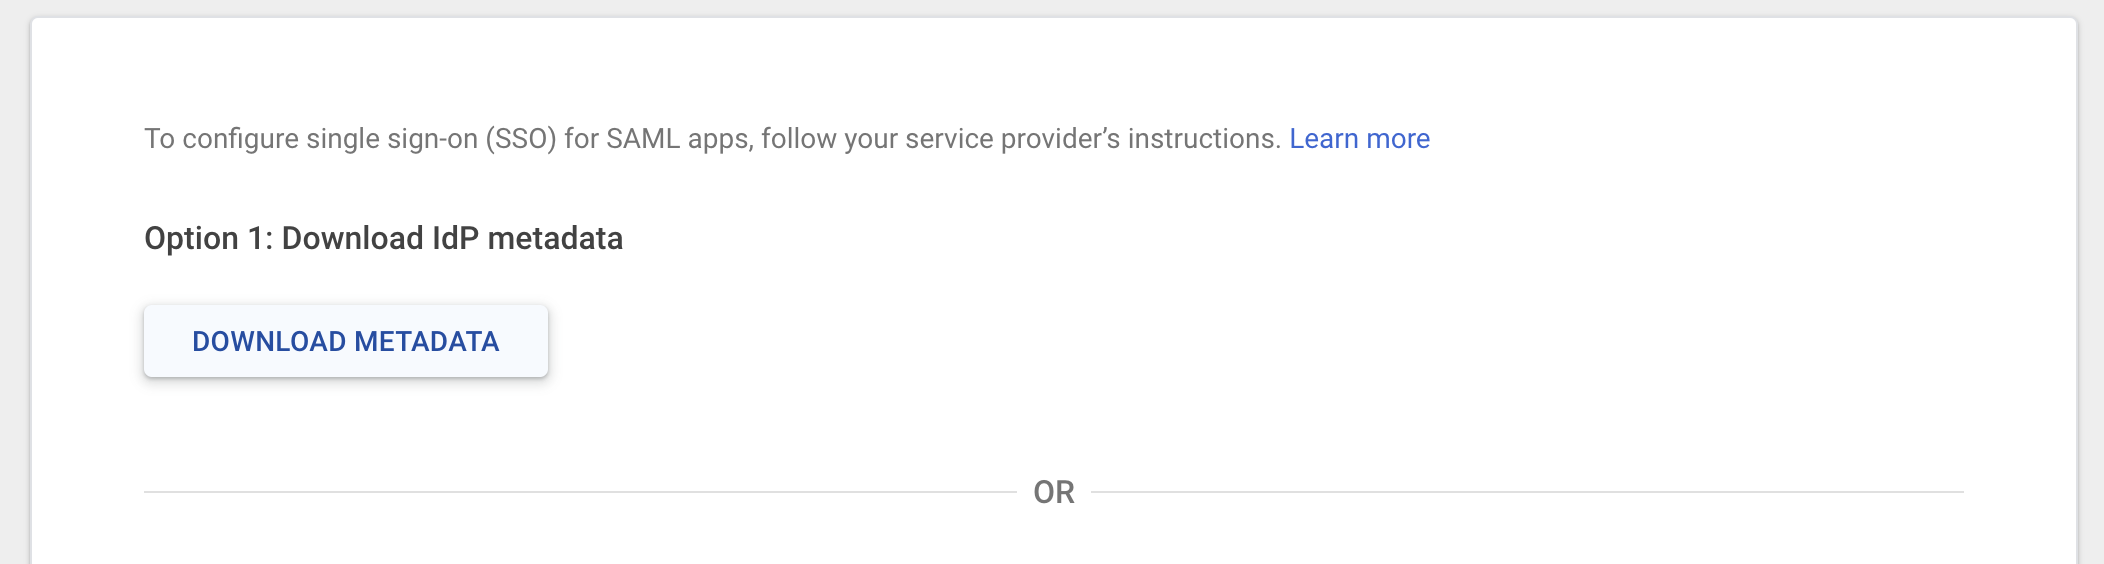
Continue through the
Feedbackprompt to complete creating the app! Once the app is created, navigate to theSign Ontab and copy theMetadata URL- you’ll need this in the next step to configure SSO in Gable.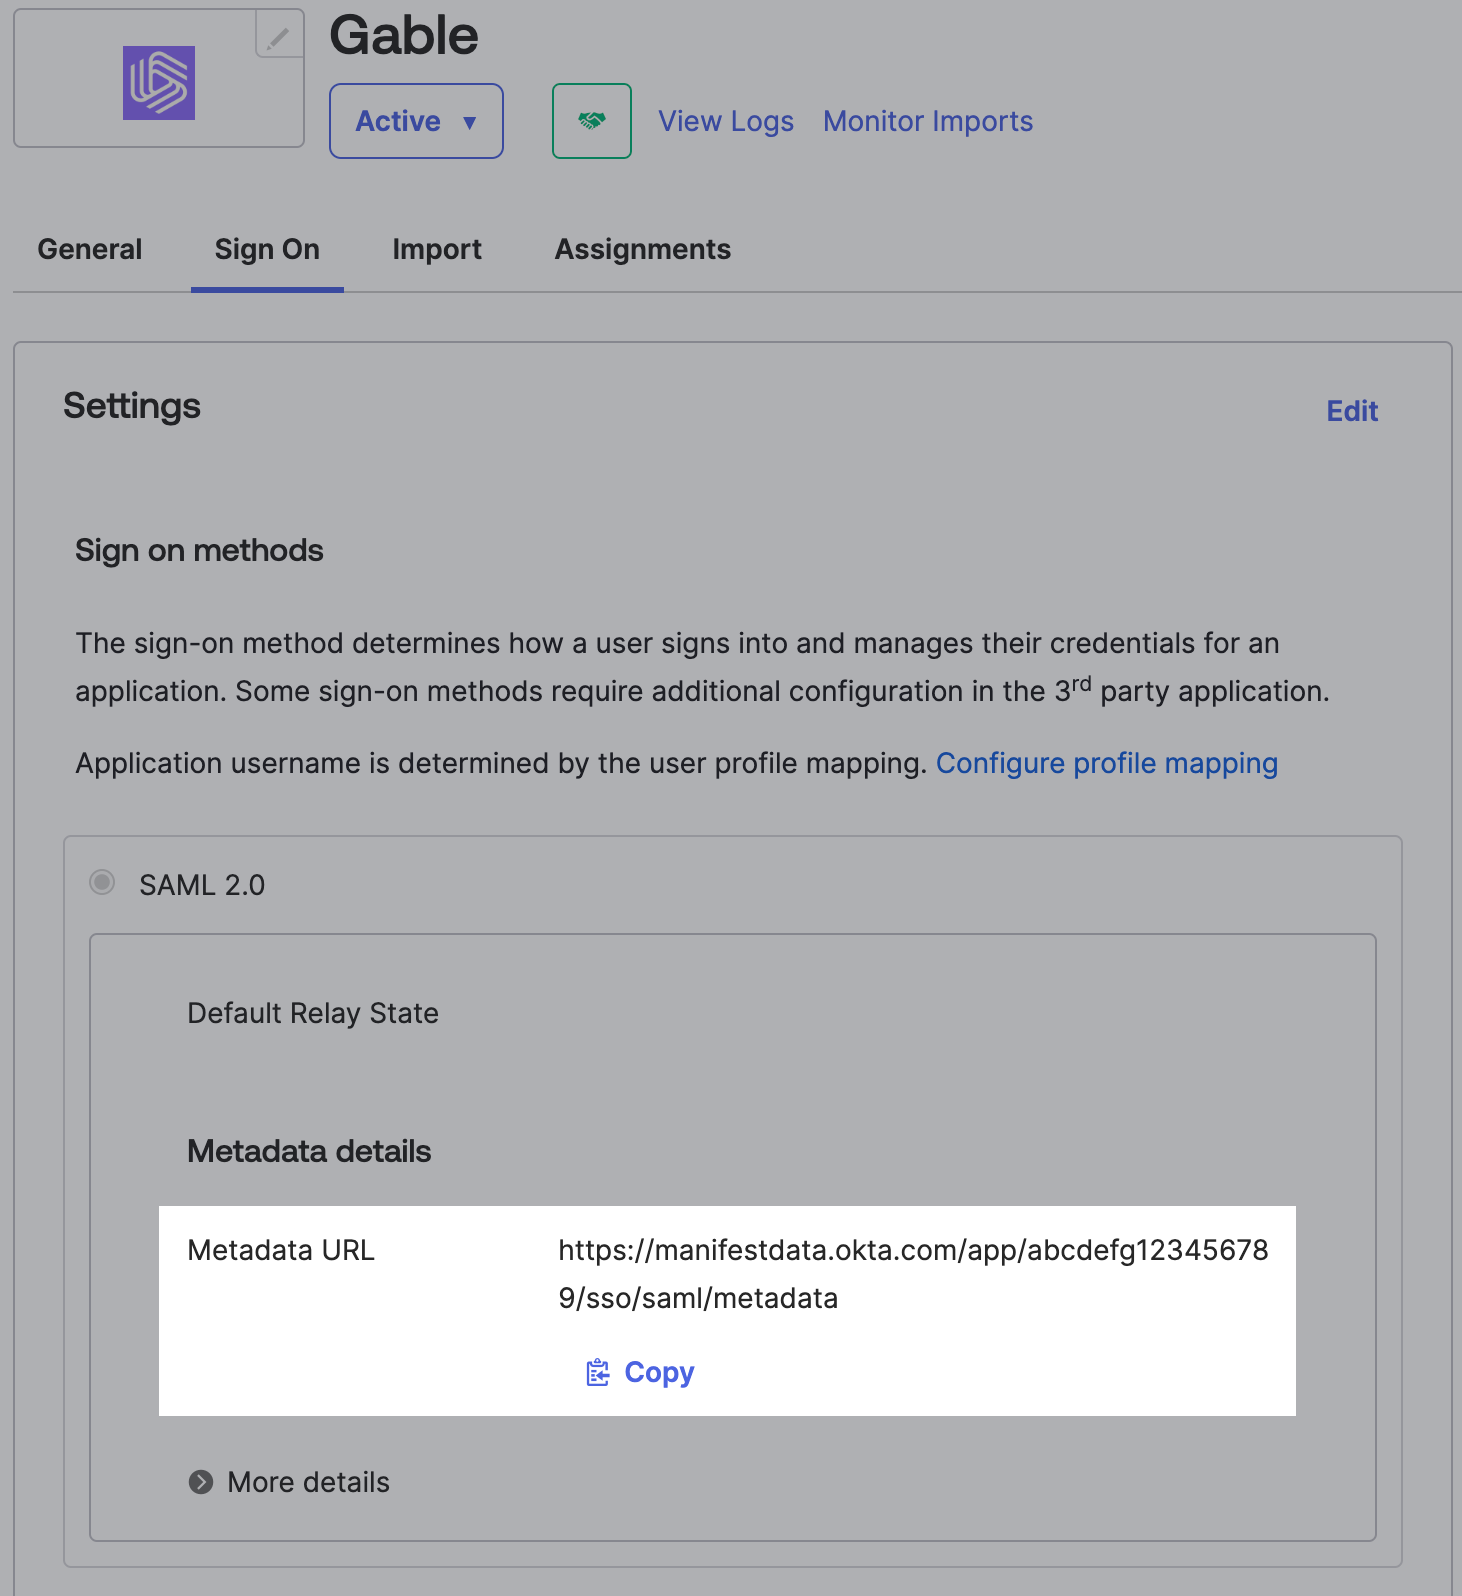
3. Configure SSO In Gable
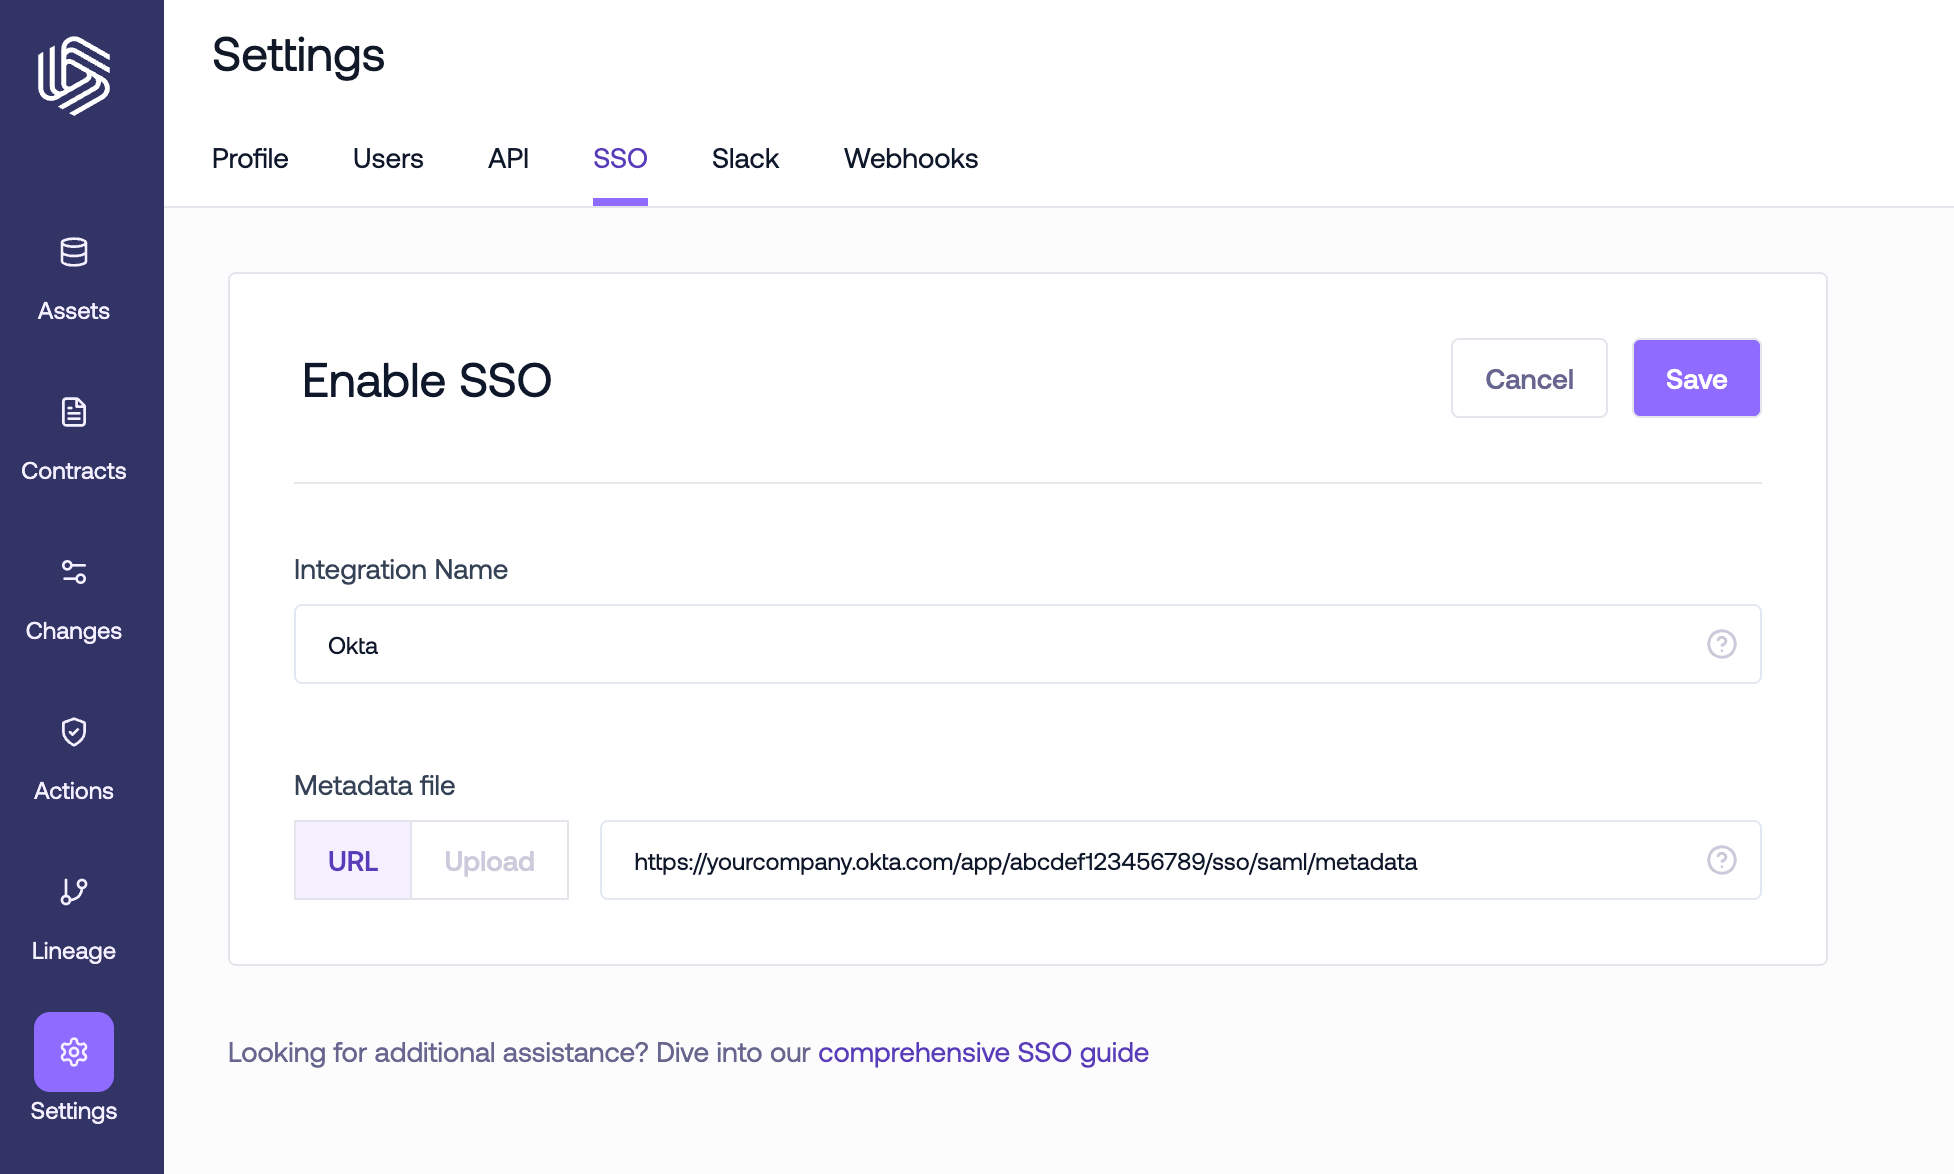
Using either the metadata URL or file provided by your IdP, configure the SSO integration in Gable.- Navigate to the
Settings->SSOpage and in the Enable SSO section, click theEnablebutton.
-
Enter name for your SSO integration - this name will be what users see when they land at Gable’s sign-in portal.
Note: The following strings cannot be used as the integration name as they’re reserved words in our identity management platform:
Google,SAML. Depending on your identity provider, either enter the metadata URL they provided or upload the metadata file you downloaded when creating the SAML app.
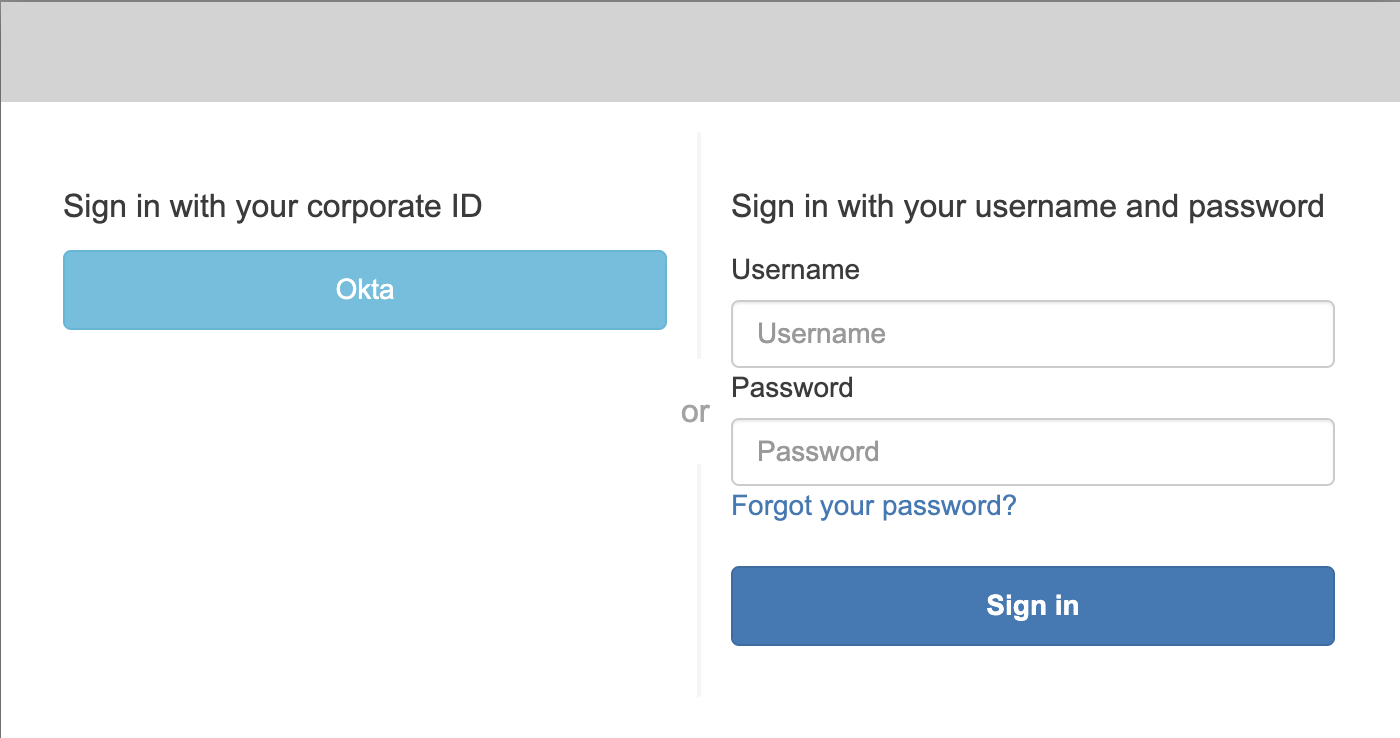
- Once you save the SSO configuration, users will have the option to sign in through your identity provider when they land on Gable’s sign-in portal.