

Before you begin
Before creating a cross-service edge, make sure the components you want to connect already exist in Gable. You need:- A scanned code component or service
- Any data store components and schemas that should participate in the edge
- The upstream component and downstream component for the lineage flow
- The fields that should be mapped between them
Identify the components to connect
- Open Lineage Explorer.
- Search for the first component you want to connect.
- Confirm whether the component is a data store or a code component.
- Search for the second component you want to connect.
- Confirm the expected direction of lineage between the two components.
Identify the fields to map
Before creating the edge, identify the fields that should be mapped between the upstream and downstream components. For data store components, fields come from the data store schema. For code components, fields come from the service’s payloads. In the edge modal, you can filter each side by field, payload, or friendly name to find the right fields. If multiple fields have the same or similar names, confirm that you are selecting the field from the correct component and payload.Add a cross-service edge
- Go to Lineage Explorer.
- Select Add Edge in the top right.
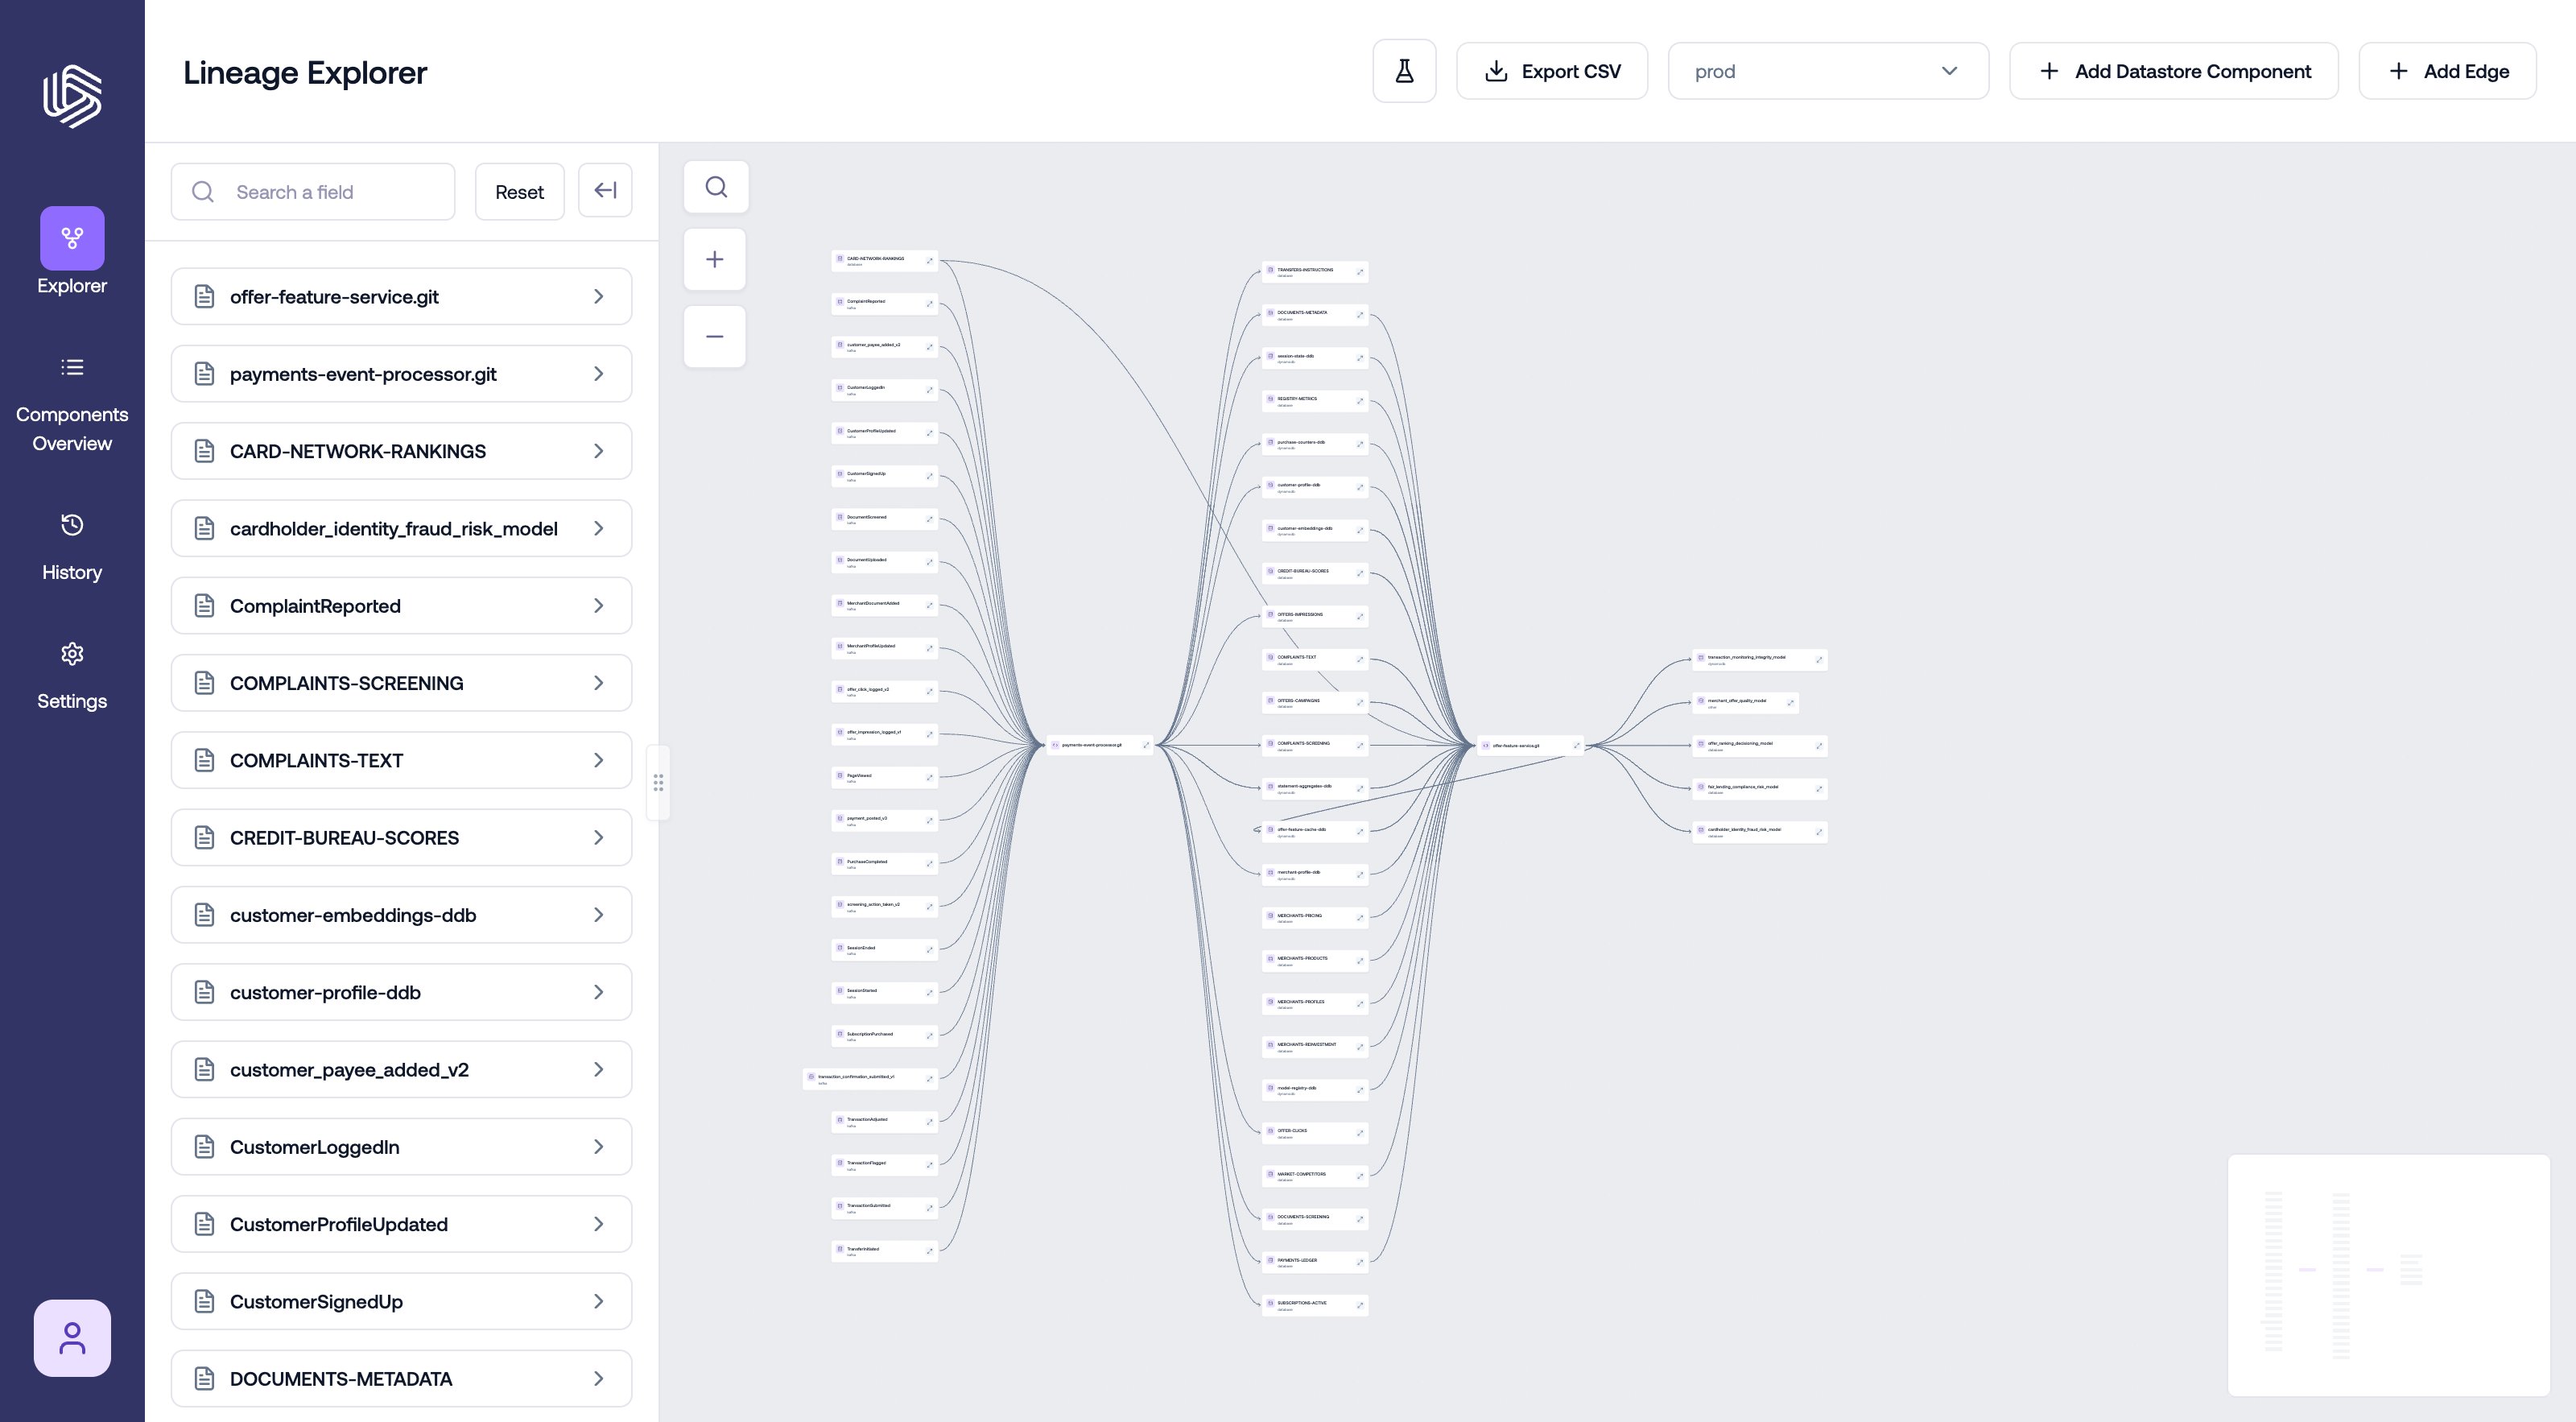
The Add Edge button in Lineage Explorer
- In the Create Cross-Service Edge modal, select the Upstream Service and the Downstream Service (either can also be a data store component). The two must be different components.
- Use the filter on each side to narrow the field list by field, payload, or friendly name.
- Map fields between the two sides:
- Select a field on one side, then select the matching field on the other side. The pair is added to the Mapped list.
- Repeat for each field relationship the edge should carry, or use Auto-Map to map fields automatically.
- Review the mapped pairs, then select Save. Gable automatically determines the underlying connection points on each component when the edge is saved.
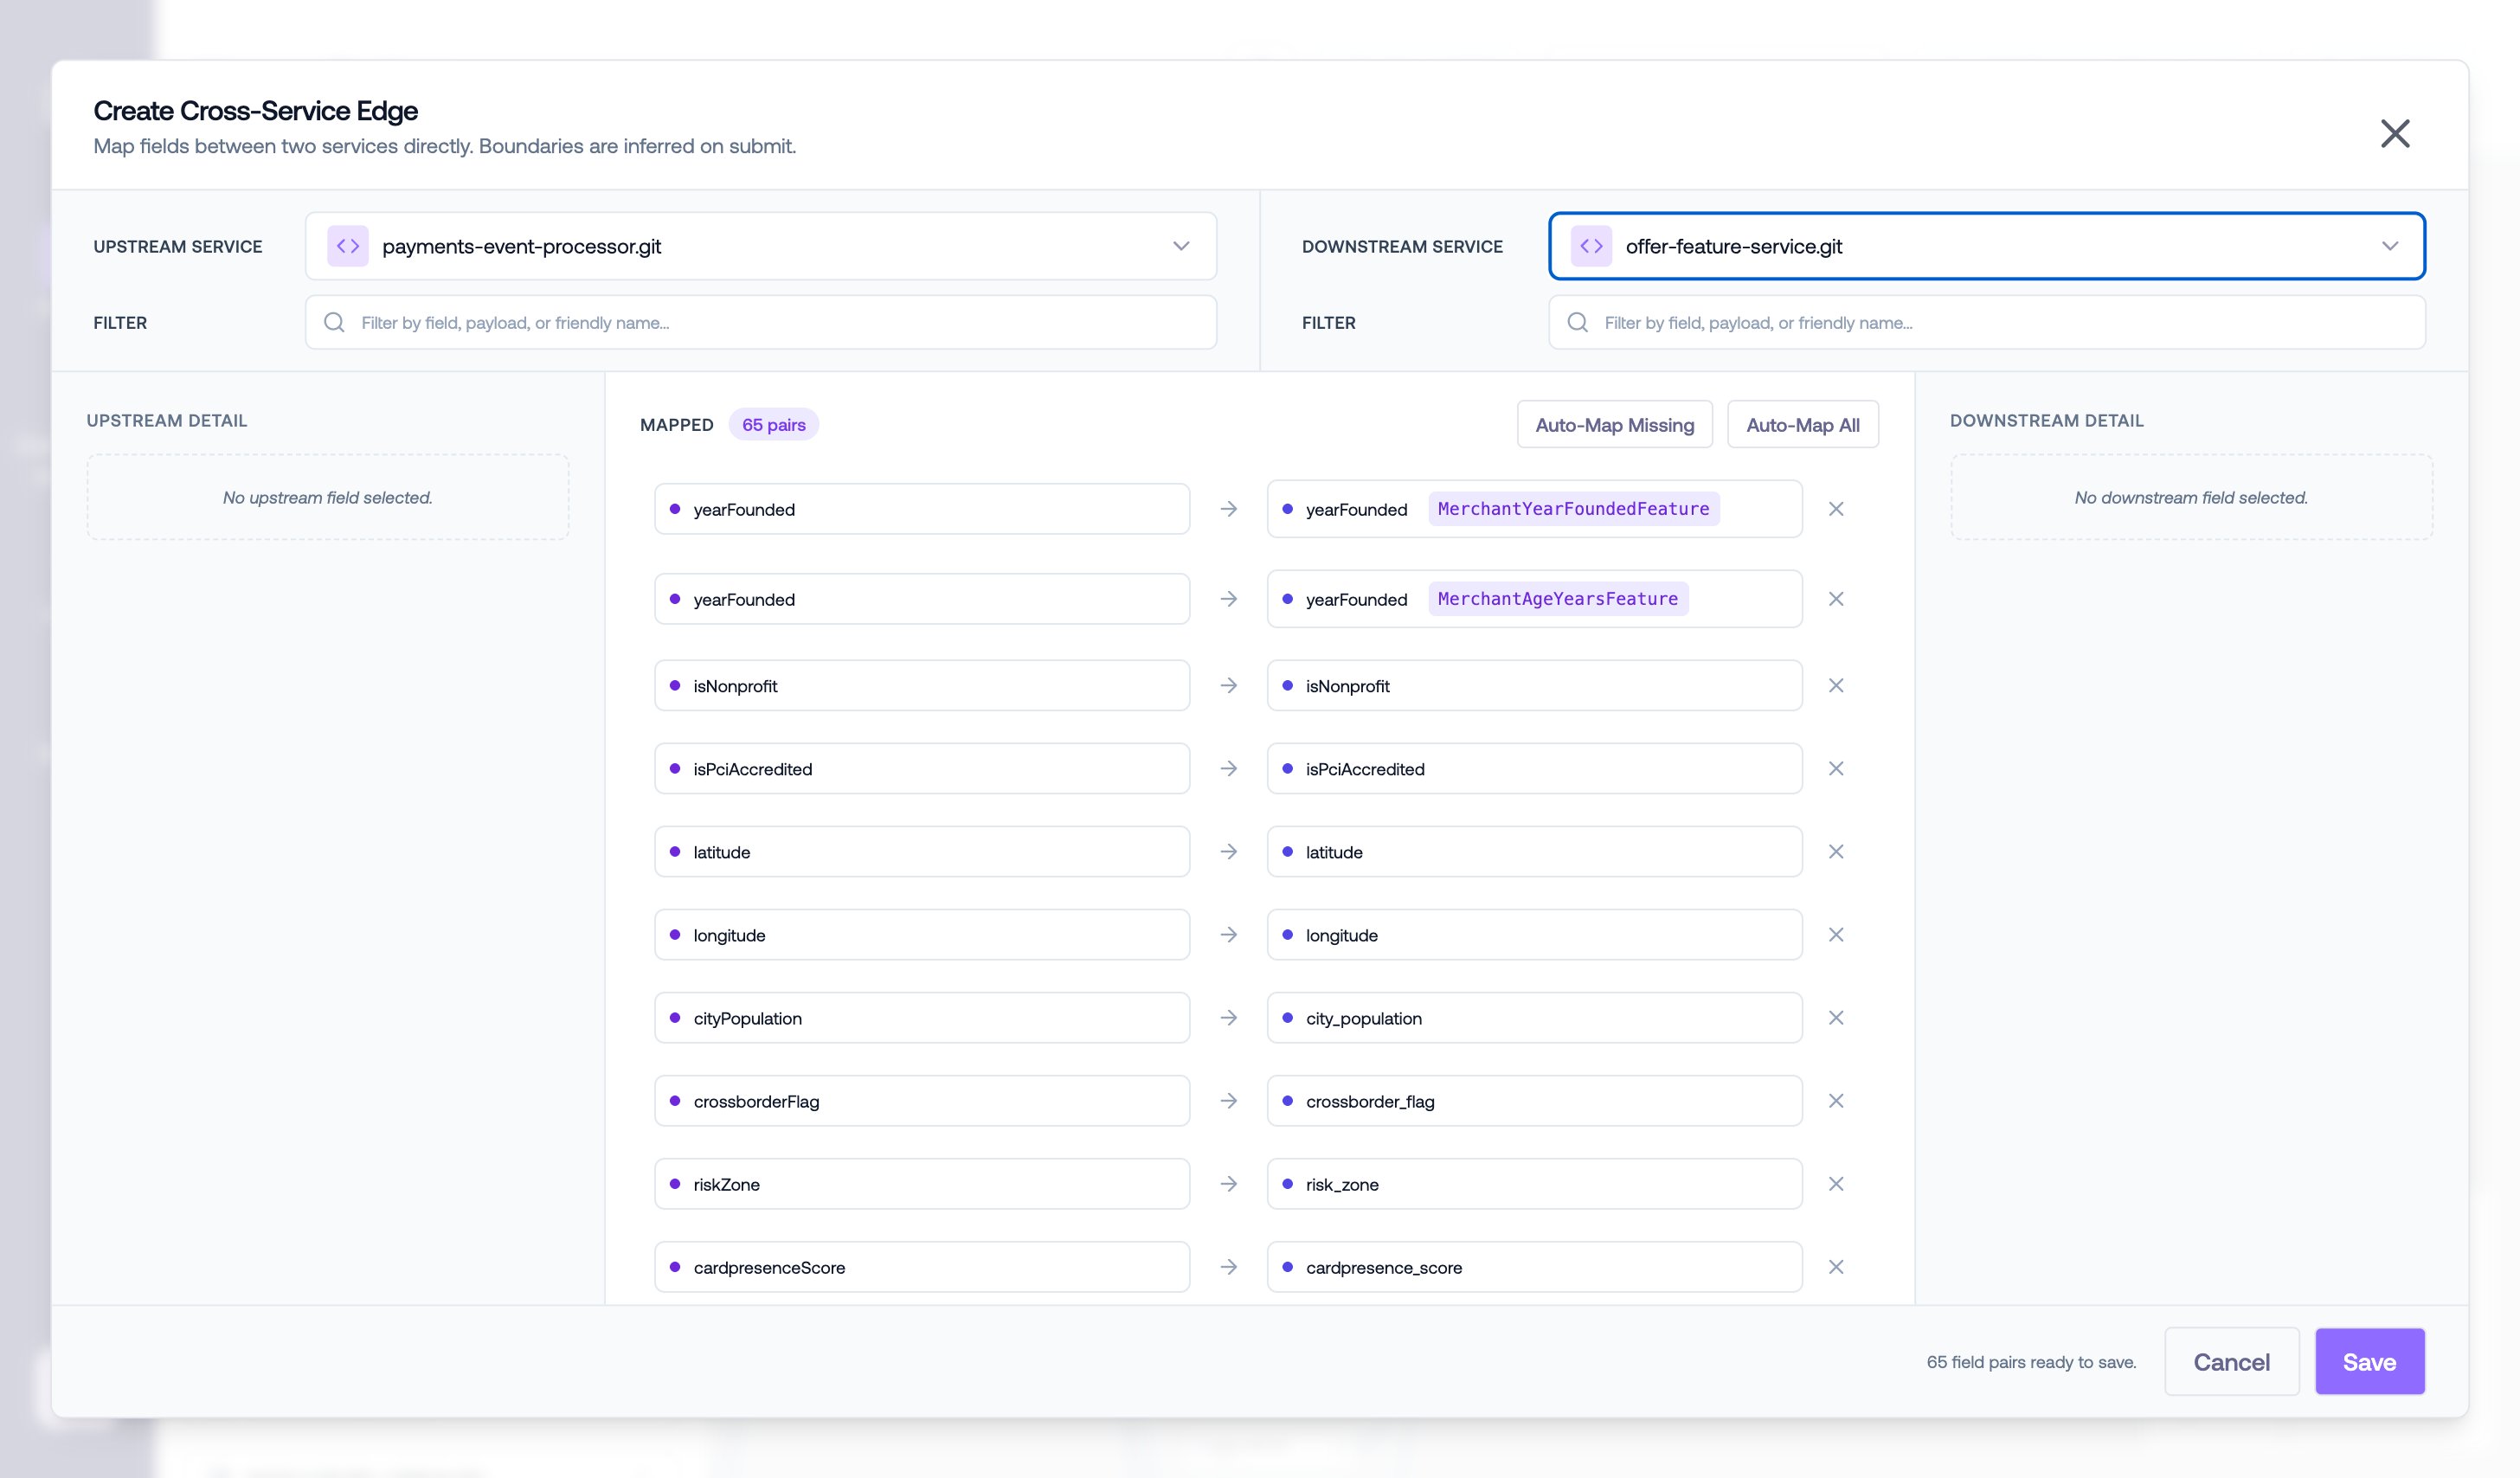
Creating a cross-service edge with field mappings
Auto-Map field mappings
When the upstream and downstream fields have similar names, Gable can compute the field mappings for you:- Auto-Map Missing — automatically maps any detected field relationships that do not yet exist. Existing mappings are left untouched.
- Auto-Map All — replaces all existing mappings between the two components with a fully auto-mapped set.
Editing edges
Use the Edge Details panel to review, update, or delete an existing cross-service edge.- Open Lineage Explorer.
- Select an edge in the graph view.
- Review the Edge Details panel that opens on the right side of the page.
- add additional field mappings with Add Edge For This Pair
- modify the edge configuration with Modify
- update existing field mappings
- delete the edge with Delete
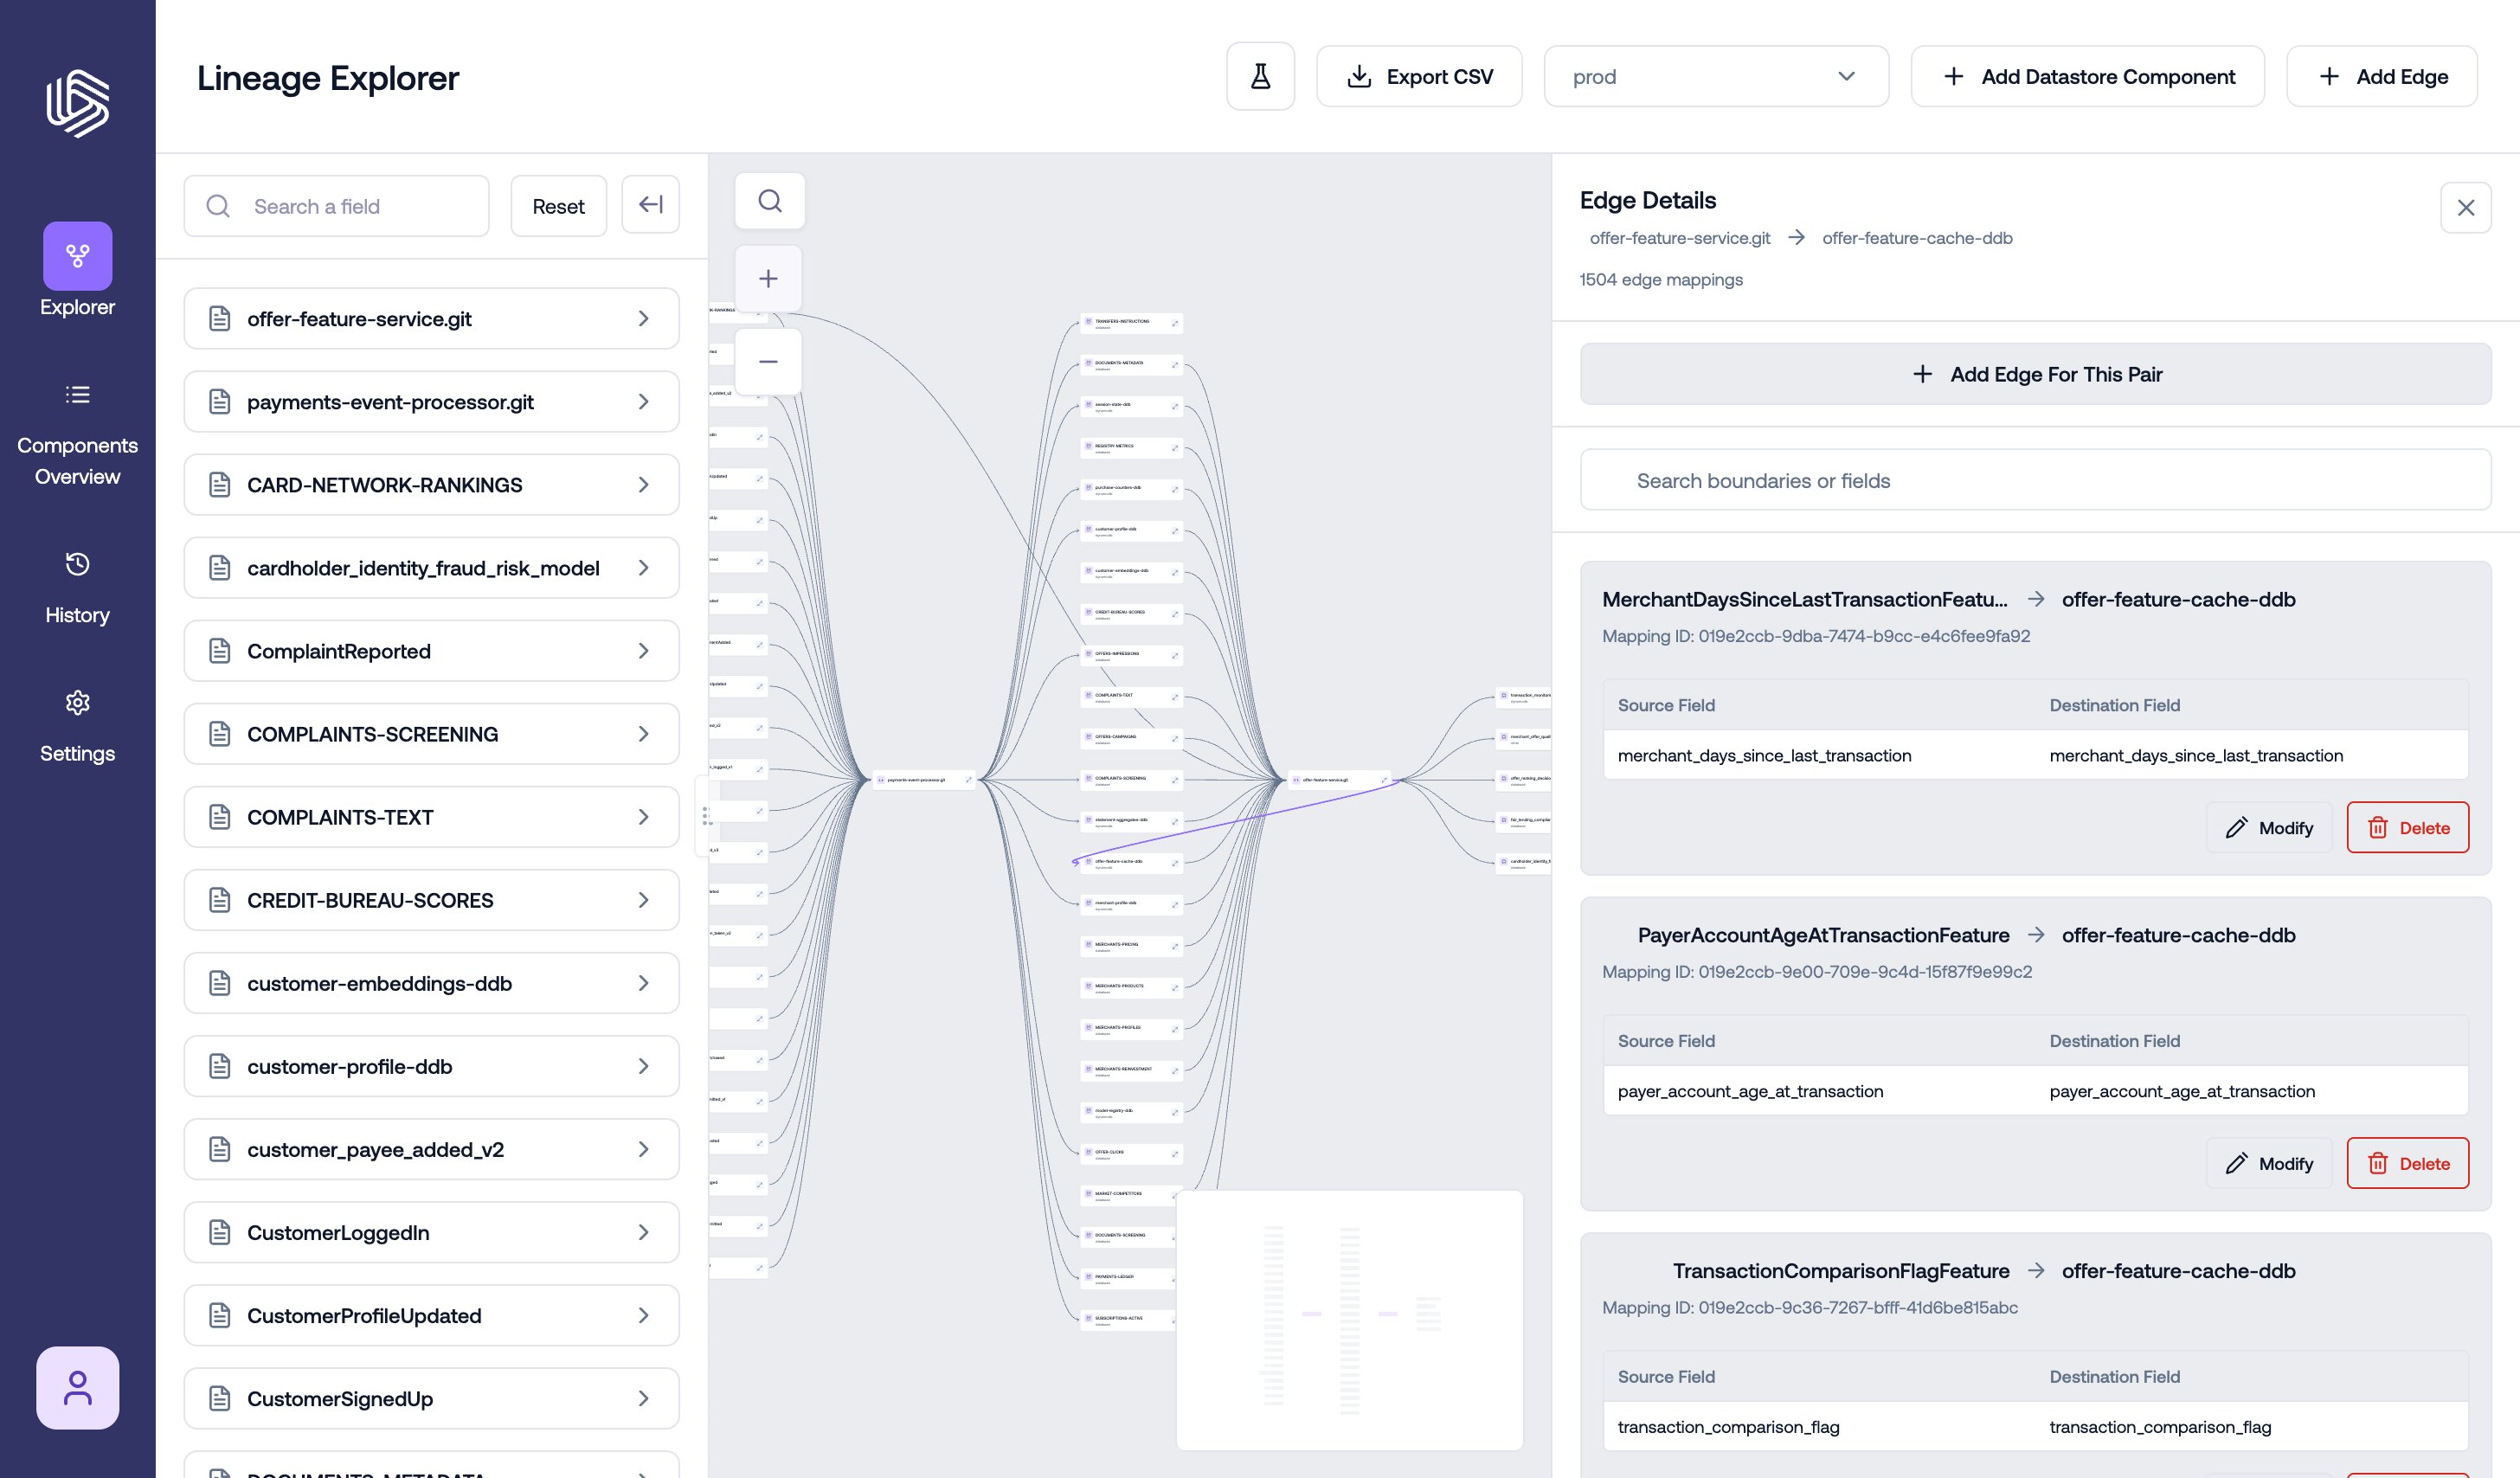
The Edge Details panel
Troubleshooting
After creating the edge, confirm that it appears as expected. If the edge does not appear as expected, check that:- the correct upstream and downstream components were selected
- the lineage direction is correct
- the expected data store schema exists
- field mappings were created and saved
- duplicate field names were mapped to the intended fields
Example workflow
A typical workflow looks like this:- Find the two components in Lineage Explorer.
- Determine which component is upstream and which is downstream.
- Select Add Edge.
- Select the upstream and downstream components.
- Filter each side by field, payload, or friendly name to find the fields to connect.
- Map fields manually or with Auto-Map Missing.
- Review the mapped pairs and save the edge.
- Validate that the edge appears in Lineage Explorer and supports the expected field lineage.